These chicken drumsticks will certainly not win any beauty contests, but when it comes to taste they are blue ribbon winners for sure, and a cracking way to begin September!!
They are as simple to make as stirring together a sauce and pouring it over chicken drumsticks in a baking dish. The oven does the rest.
You do have to take them out every fifteen minutes and flip them over . . . but the end result is more than worth a little bit of faffing about.
Kids and husbands love them. Mom's do too, if only for the ease of preparation and yes, they taste delicious too. All you need on the side is some rice and a vegetable. Delicious!
These are simple to make and very delicious! Serve with some steamed rice and a vegetable for a real family pleasing supper! Children, especially, love these.
2 1/2 pound chicken legs
(I used skinless ones for less fat)
255g of honey (3/4 cup)
145g of soy sauce (1/2 cup)
60g tomato ketchup (1/4 cup)
2 to 3 cloves of garlic, peeled and minced
salt and black pepper to taste
onion granules (optional)
Preheat the oven to 180*C/350*F/gas mar 4. Butter a baking dish large enough to hold the chicken legs really well. Lay the chicken legs out in the dish in a single layer. You want a dish large enough so that the chicken legs will only be partially submerged in the liquid. Season the chicken drumsticks with salt, pepper and onion granules if using. Whisk together the remaining ingredients until smooth. Pour over the chicken drumsticks. Bake in the pre-heated oven for 15 minutes, Remove and flip the legs over. Return to the oven and bake for another 15 minutes. Remove and flip the legs over. Return to the oven and bake for a further 15 minutes. (45 minutes in all) Remove from the oven and spoon the sauce over all. Increase the oven temperature to 220*C/425*F/gas mark 7. Return the chicken to the oven for another 10 to 15 minutes, or until the sauce begins to caramelise on the legs. Remove from the oven and let stand for about 5 minutes before serving. Pass the napkins as these are finger licking delicious!
These are also really good in lunch boxes! Pack a bit of salad to go along with them!
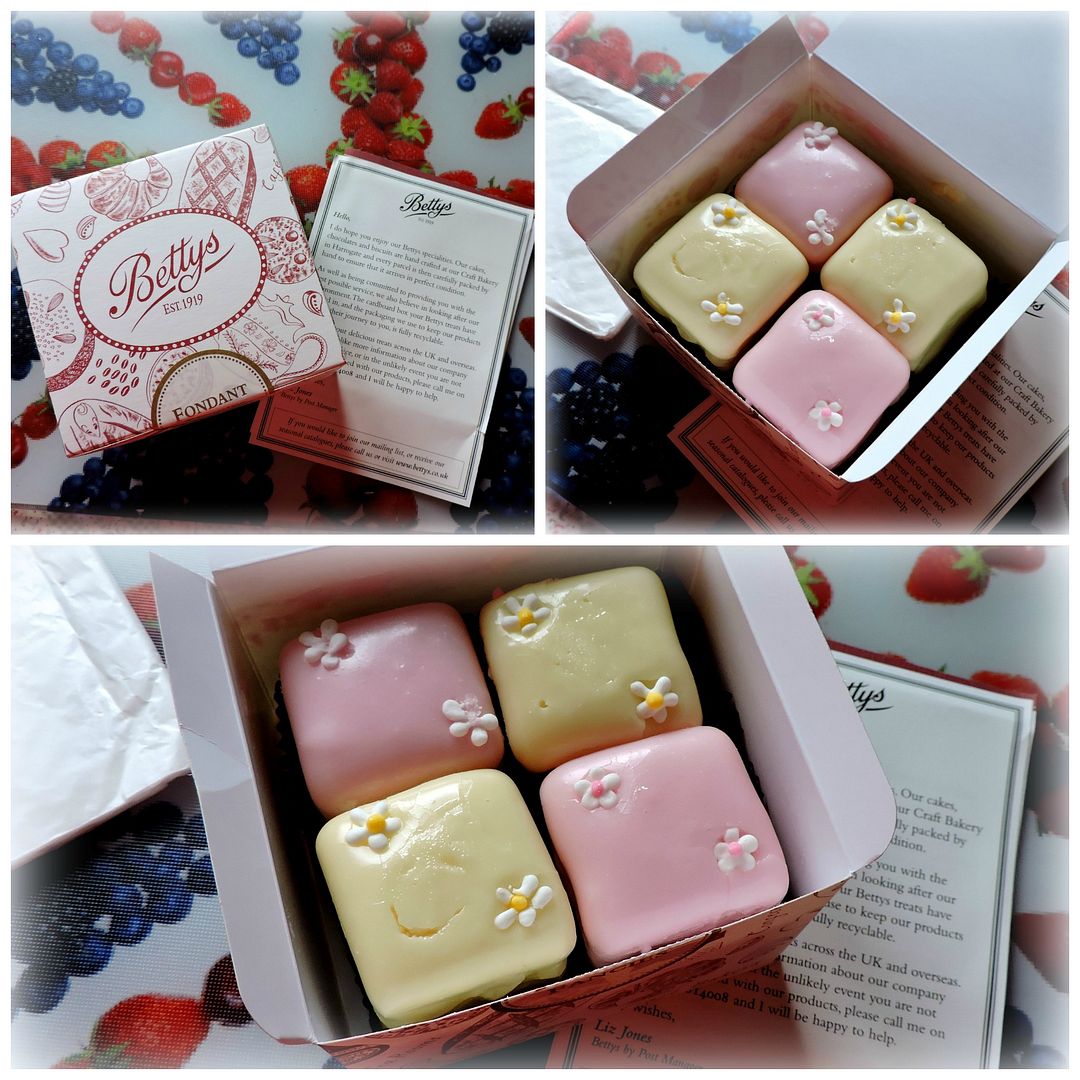
For nearly 100 years, people have been flocking to Yorkshire for a taste of Bettys. Bettys was founded by Frederick Belmont, a Swiss baker and confectioner who came to England in search of opportunities to develop his craft skills. He opened his first Café Tea Rooms in Harrogate in 1919 and named it 'Bettys'. The reason why remains a mystery to this day.
Lots of things have changed since then. They now have six Café Tea Rooms in Yorkshire and the Bettys name has become famous the world over. They have also added a mail order service which delivers deliciousness to homes from Tunbridge Wells to Tokyo, and they share their knowledge and passion for food through Bettys Cookery School.
But in other ways, they are unchanged. Still family-owned, they believe in doing business in a way that is fair to people and kind to the planet. And at their Craft Bakery in Harrogate they still practice the artisan skills that Frederick Belmont brought to Yorkshire from Switzerland nearly 100 years ago.
Its now Great British Bake Off Season here in the UK, and in honor of that each week Betty's will be sharing a delicious recipe, plus a video and their baking tips to go with each recipe. The kind of thing you won't find in any cookery book!
This week they sent me some delicious Fondant Fancies to enjoy eating while we enjoy watching the GBBO! I can't wait to get stuck in. They look delicious!
This week they are tackling Choux Pastry with a recipe, a video and their handy tips for success in making this type of pastry. I know that making Choux Pastry can be a bit of a challenge for most people. This is the first in a series of three videos/tips that they will be sharing with us, with the end result being a Croque en Bouche. Next week we will be shown part 2, piping and the week after that spun sugar!
Ingredients 130ml water (4.5 fluid ounces) 130ml whole milk (4.5 fluid ounces) pinch of caster sugar pinch of salt 110g butter, cubed (7 1/2 TBS) 140g plain flour (1 cup) 3 eggs (medium), beaten Method 1. Place the water, milk, sugar and salt together in a heavy based pan over a moderate heat. Add the butter and bring to the boil. 2. As the liquid comes up to the boil, remove from the heat and stir in all the flour in one go. Using a large spoon, beat quickly until all the flour is combined and a thick paste forms. 3. Return to the heat and cook for a further 1-2 minutes until the paste forms a cohesive ball, dries out and comes away from the sides of the pan. 4. Remove from the heat, place into a mixing bowl and allow it to cool slightly for a few minutes. 5. When cool, gradually add the egg a little at a time, beating after each addition. Continue until you get a dropping consistency and a stiff batter has formed (you may not need all of the egg).
BAKING HINTS FROM BETTY'S Chop Chop Chop up the butter so it melts faster. Large chunks reduce the temperature of the liquid and will mean more evaporation – this will change your recipe. Chute the flour in quickly. Slowly bring it all together.
Stir it Up Use a high temperature and keep the mixture moving to create a ‘choux ball’. Look for a residue of flour sticking to the bottom – this means it’s cooked out. 'Paint’ the bowl with the mixture. This cools the mix to the right temperature to add the egg. Add eggs gradually. Otherwise you’ll saturate the mixture and the egg will sit on the surface. Look for a fluid consistency.
Helping Hands Use a damp tea towel as your extra pair of hands - it secures your bowl while you’re mixing. Use an electric mixer to add ¾ of the egg (adding a little at a time). Then switch to a wooden spoon –this will help you feel the consistency and work out when the batter is formed. When the mixture grips the bowl, add more egg. Egg is nature’s ingredient. It’s about how the mix is behaving, not what the recipe says. You may need more or less. To tell if your choux is ready, lift the mixture out of the bowl on a spoon. You’re looking for an elongated ‘V’ shaped tear.
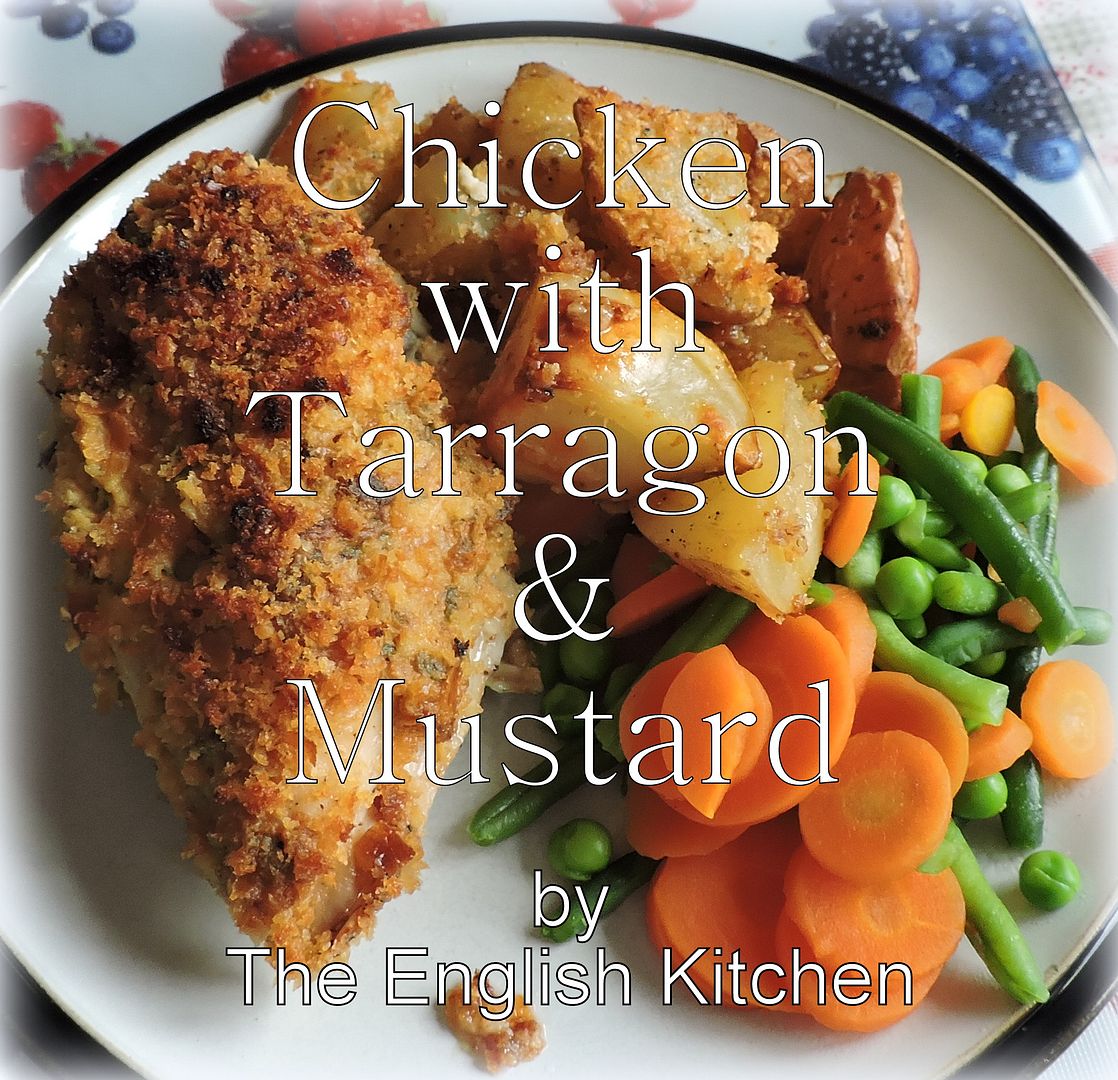
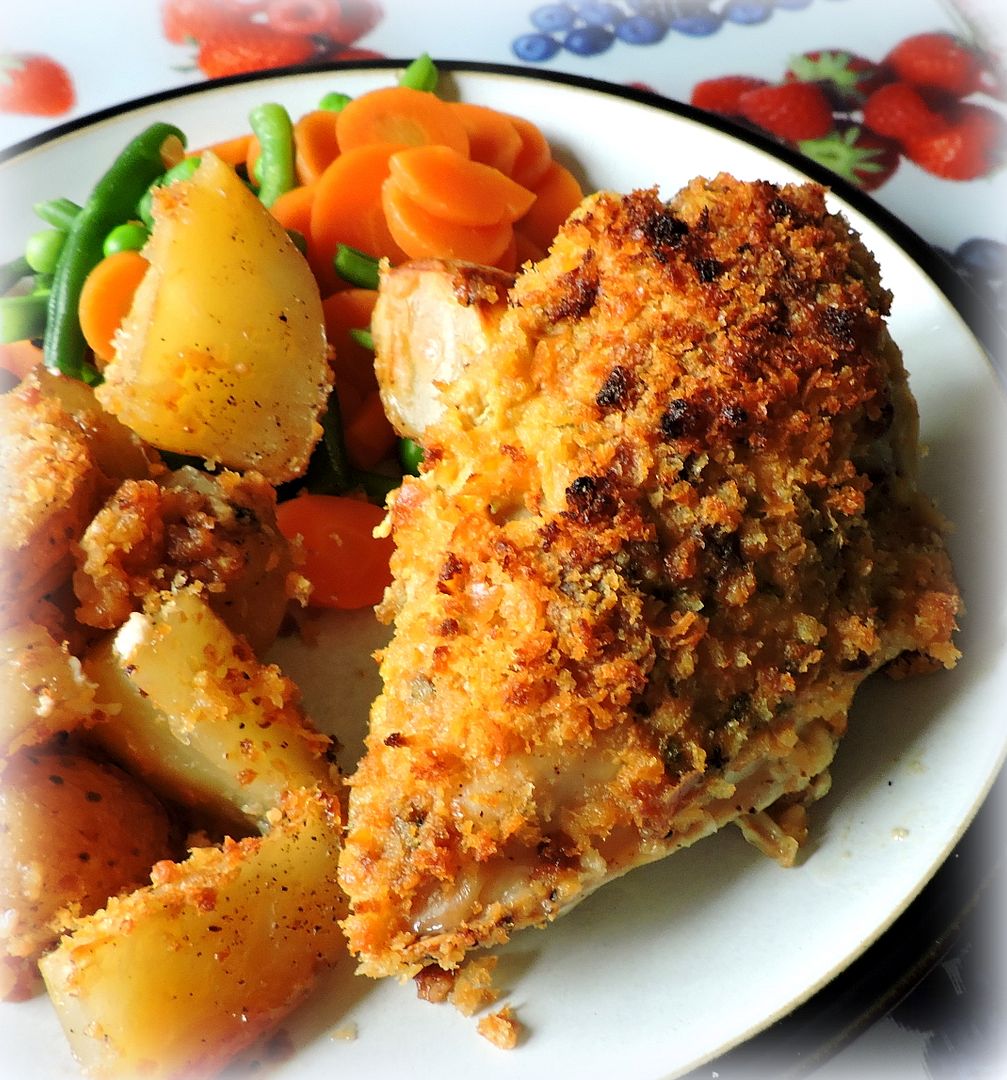
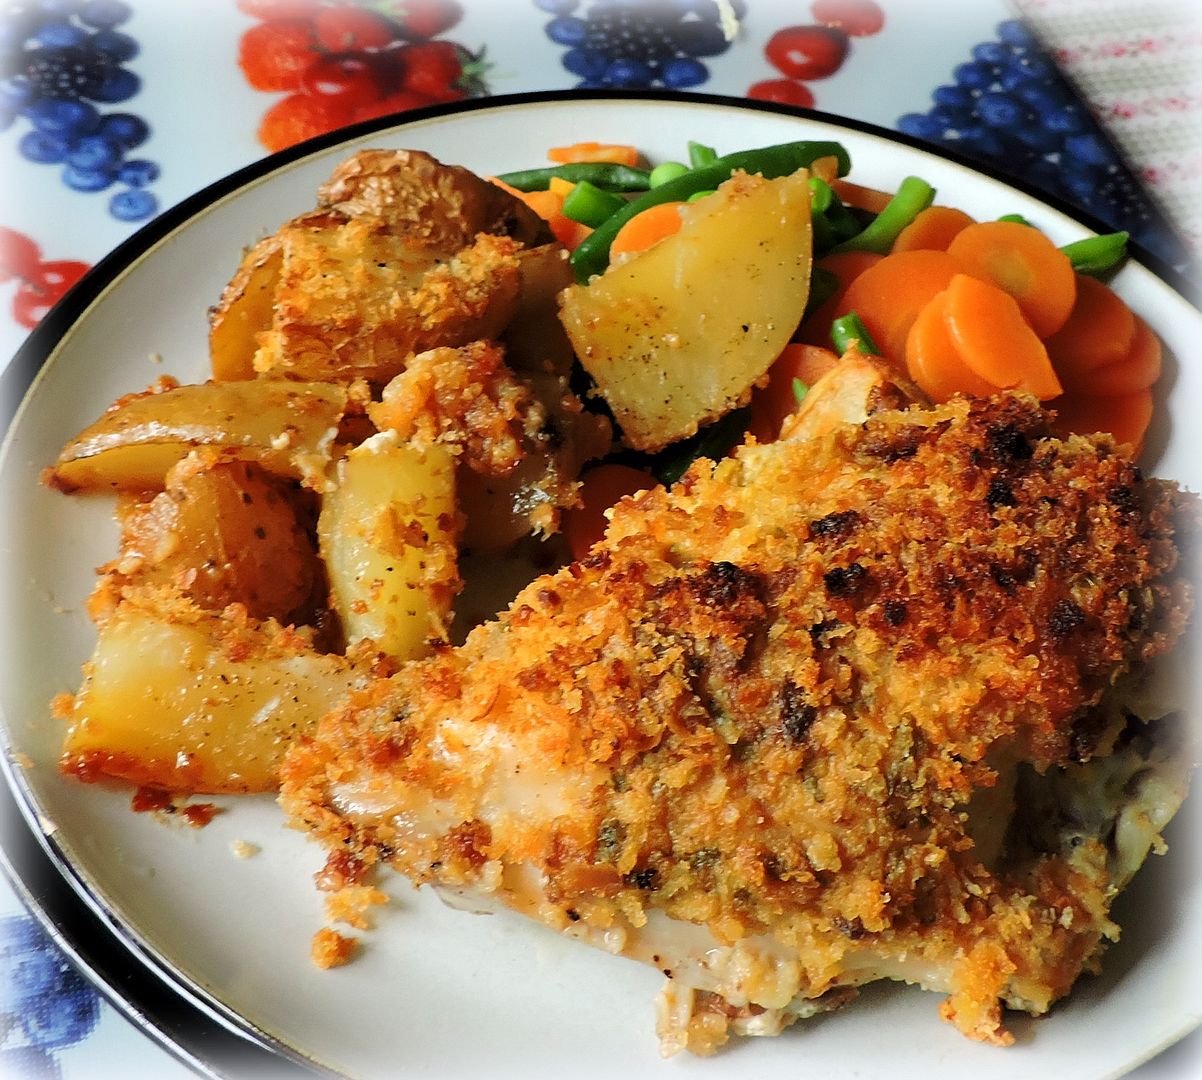
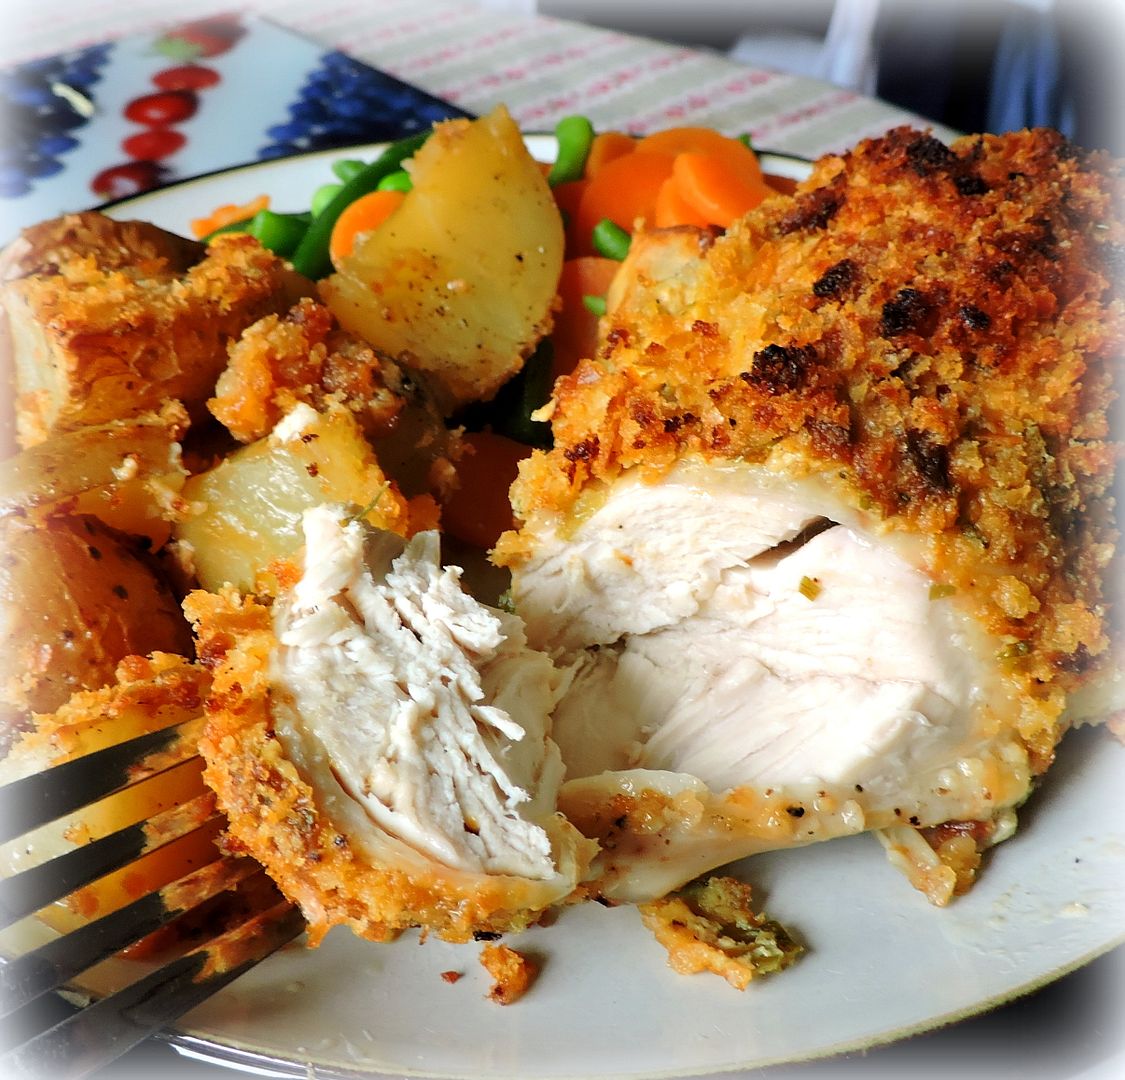
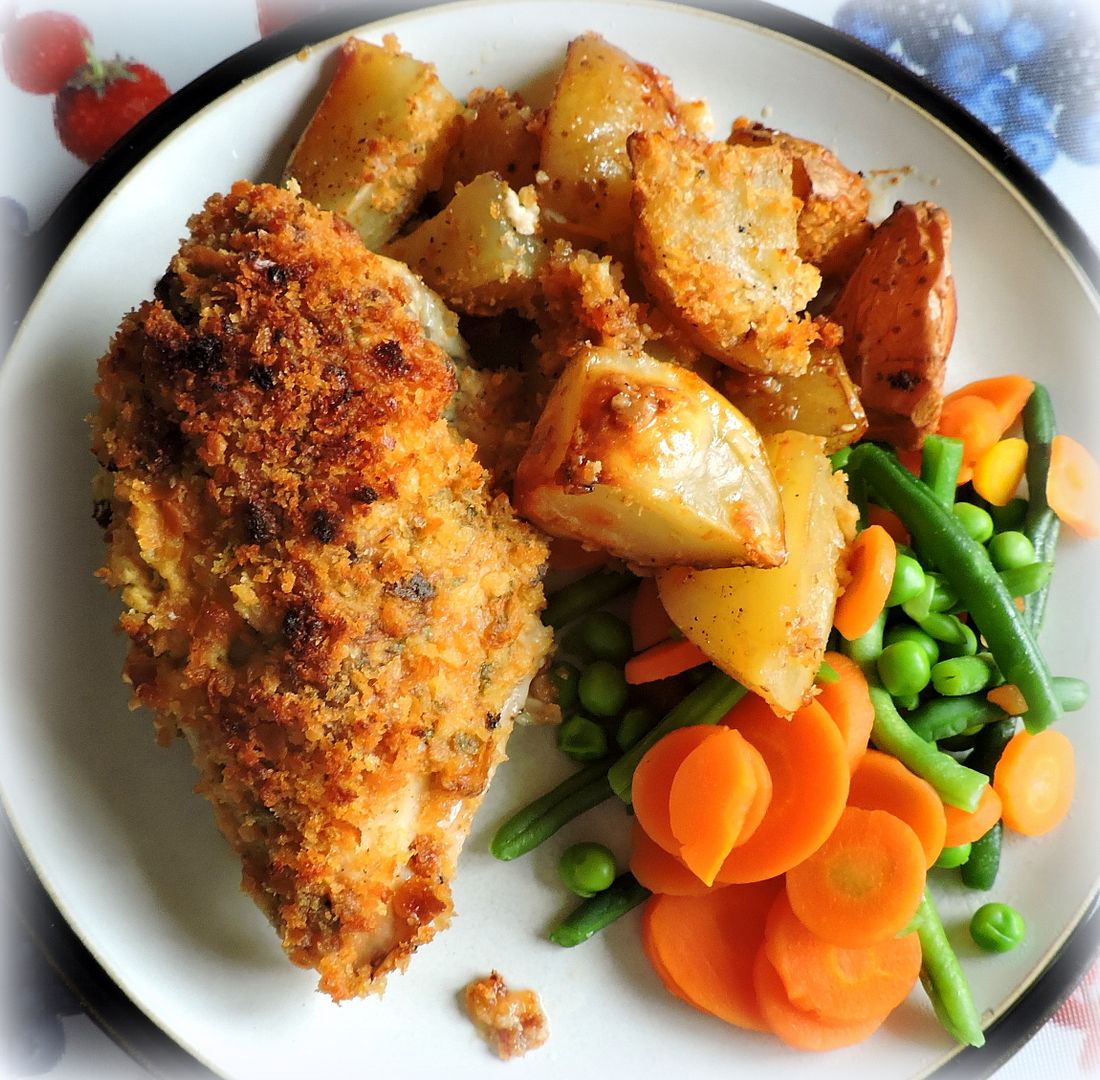
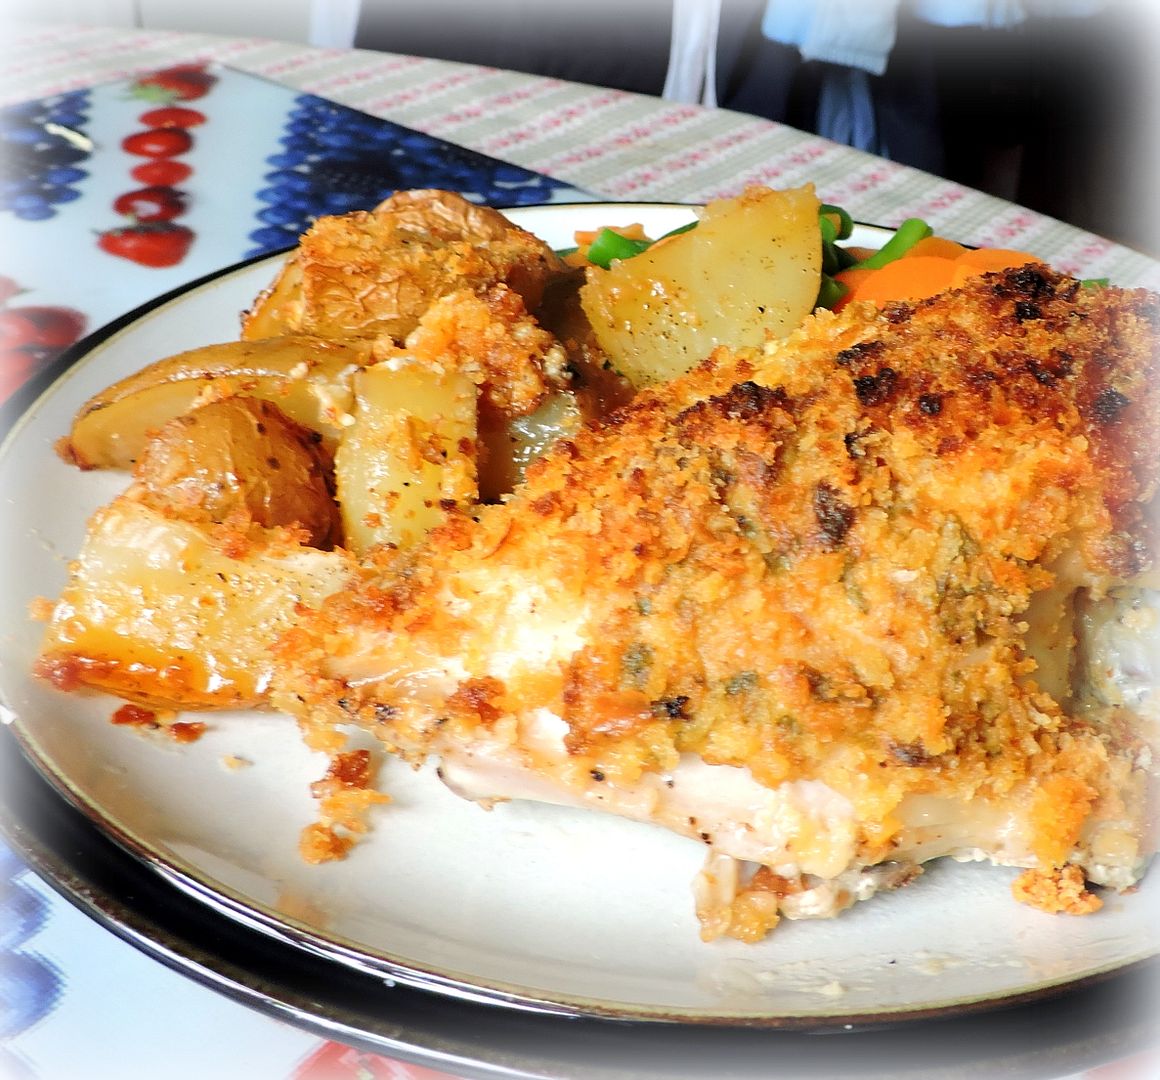
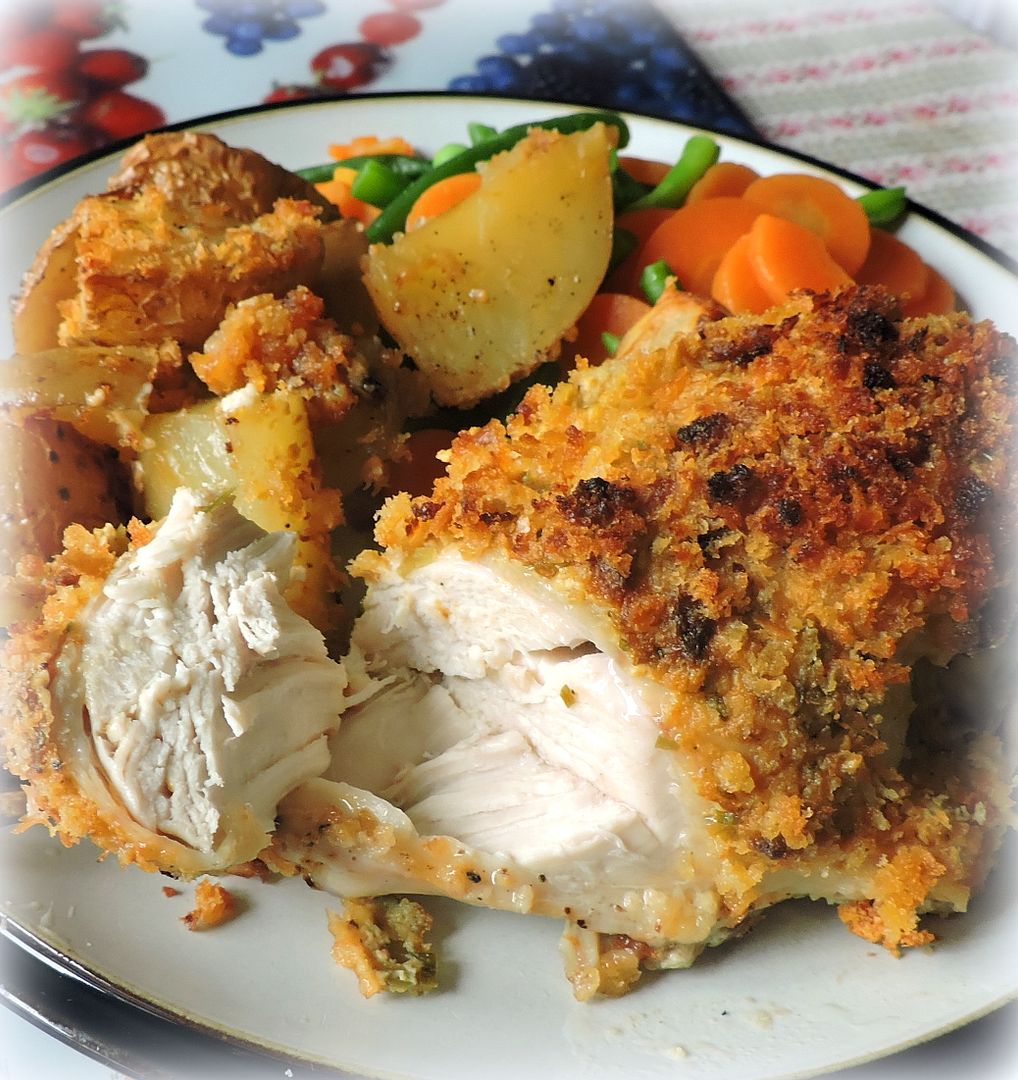
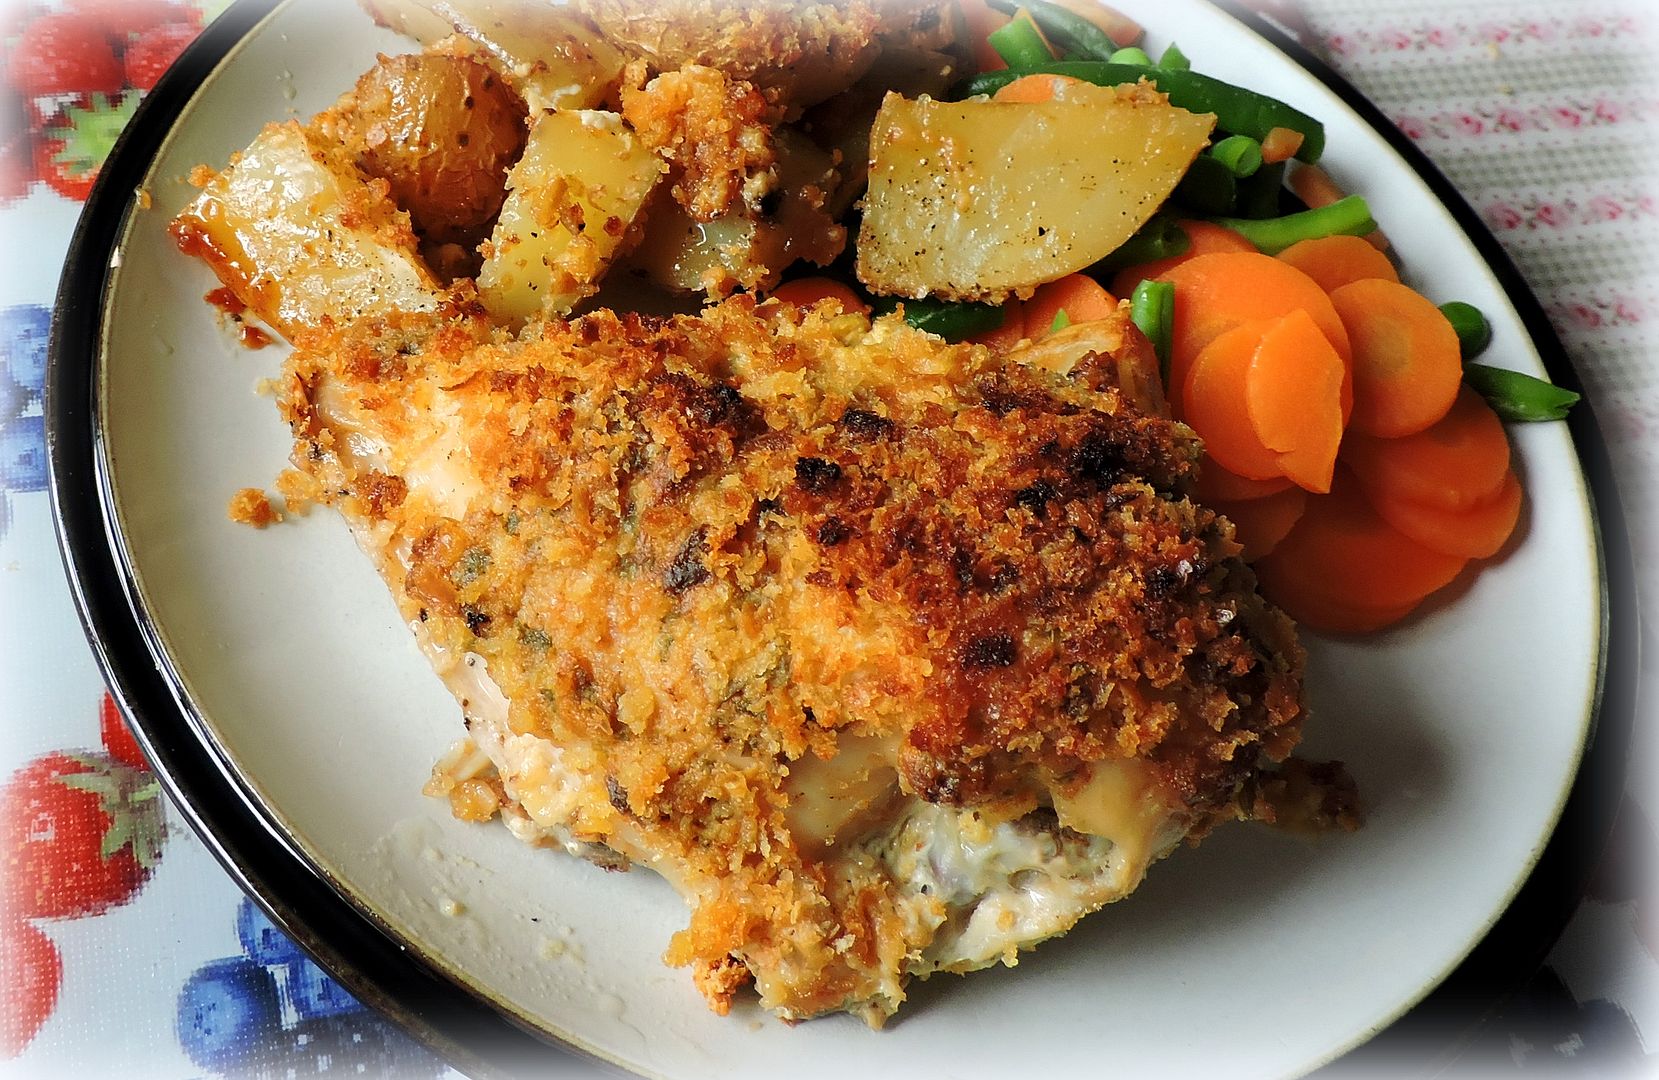
This is a delicious chicken recipe that I made for our tea the other night. I had some partially boned chicken breasts that I wanted to use. I adapted the recipe from one that I found in a Diana Henry cookery book entitled A Bird in the Hand, chicken recipes for every day and every mood. It's a great book. I have a number of Diane's cookerybooks and I have to say I really like her recipes. They are very good.
The original recipe called for skinless chicken, any cut . . . I had partially boned breasts with the skin on and so I just left them the way they were.
I also didn't have any fresh tarragon, but I figured that it wouldn't make much of a difference to use dried, and so I adjusted the amount to reflect that. If you are using fresh, you will have to roughly double the amount used. I also added some potatoes to the roasting tin and sprinkled any extra crumbs on them. SCRUMMO!
The end result was deliciously succulent chicken and potatoes which were slightly sticky and wonderfully flavoured with the juices of the chicken and crumb mixture. It goes without saying you want a good Dijon mustard here as it is an integral part of the dish. All round I would call this a winner/winner chicken dinner!
A great midweek supper. Simple to make and soooo delicious! No faffing about, and hassle free, this tastes gourmet, but is actually quite easy to make.
8 TBS Dijon mustard
4 TBS butter, softened
1 TBS dried chopped Tarragon
salt and black pepper to taste
2 slices of stale bread made into crumbs
8 chicken pieces (I like partially boned, skin on chicken breasts)
Preheat the oven to 220*C/425*F/ gas mark 7. Butter a baking dish large enough to hold the chicken in one layer.
Place the chicken into the dish in one layer. Season all over with salt and black pepper. Cream together the butter, mustard and tarragon. Spread this evenly over your chicken pieces. Sprinkle with the bread crumbs, pressing lightly to adhere.
Bake for 35 to 40 minutes, until golden and the chicken juices run clear when you pierce the flesh with a fork or skewer close to the bone. If they are not clear, return to the oven for a few minutes longer. If your crumbs are browning to quickly lightly cover with a sheet of foil, removing it during the last few minutes of roasting to crisp them up lightly.
Serve hot, wih any pan juices. Potatoes and a green vegetable go well with this.
Note: To cook the potatoes with the chicken, just quarter some medium potatoes, peeled or not as you want, toss them with a smidgen of olive oil and some seasoning and place them around the chicken in the dish. Sprinkle any extra crumbs on top, and bake as above.
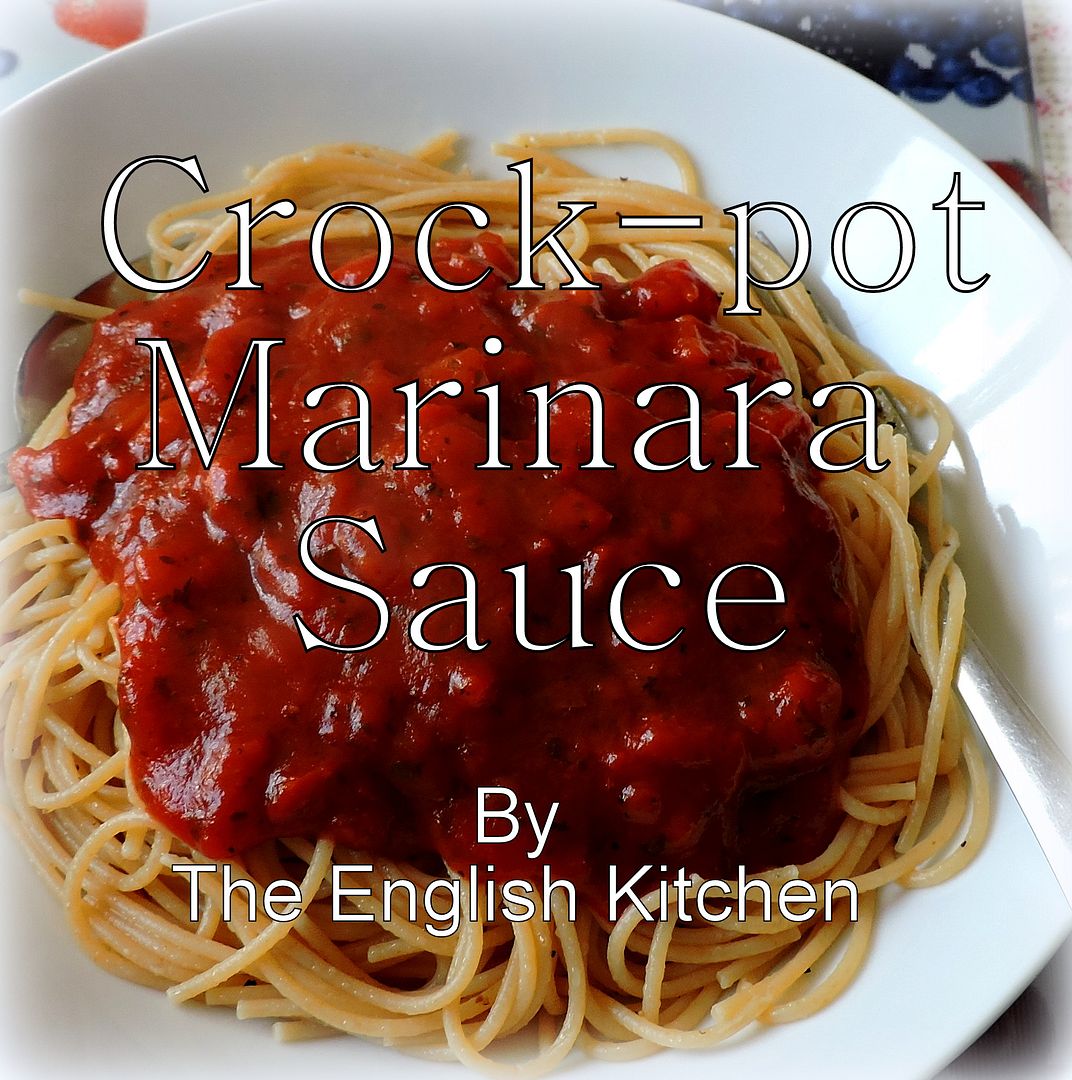
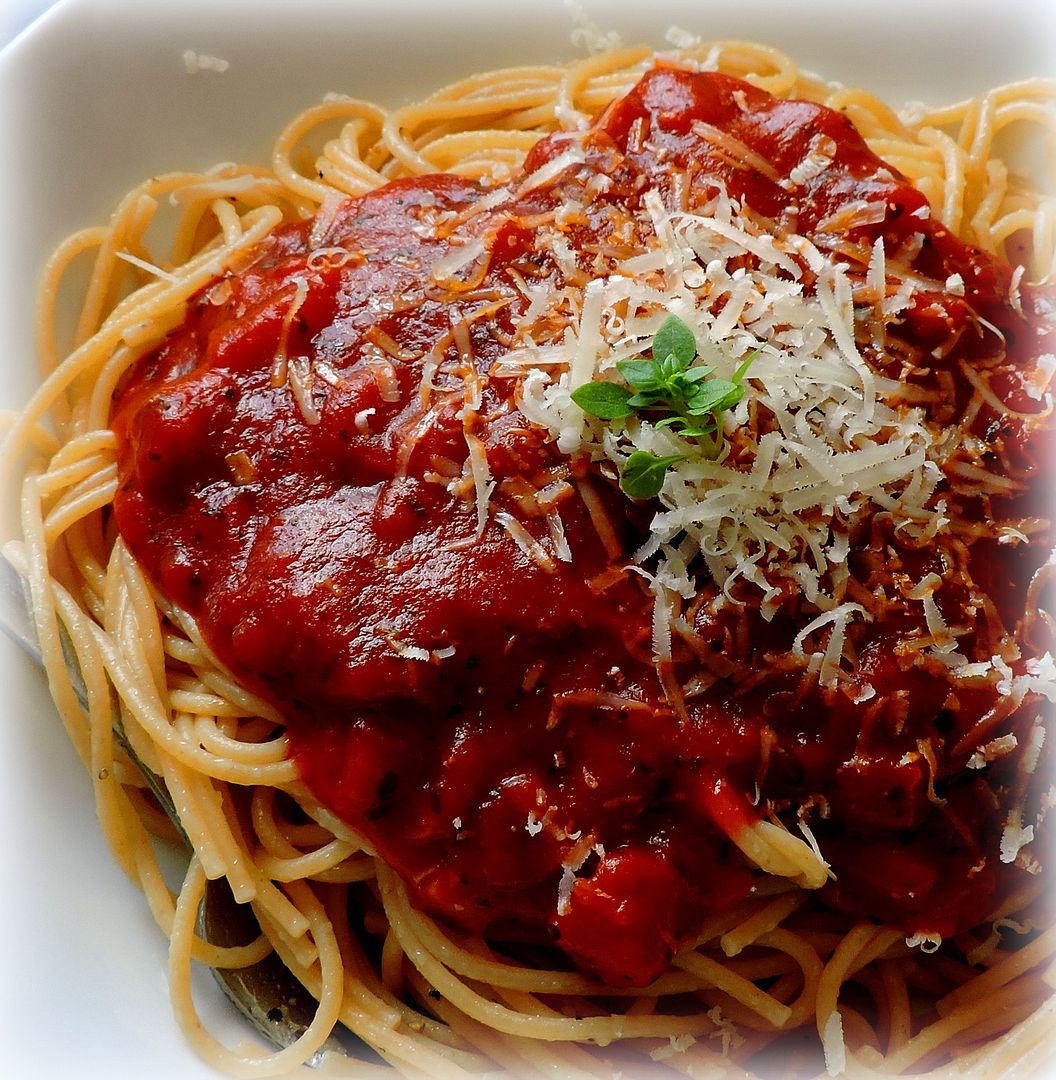
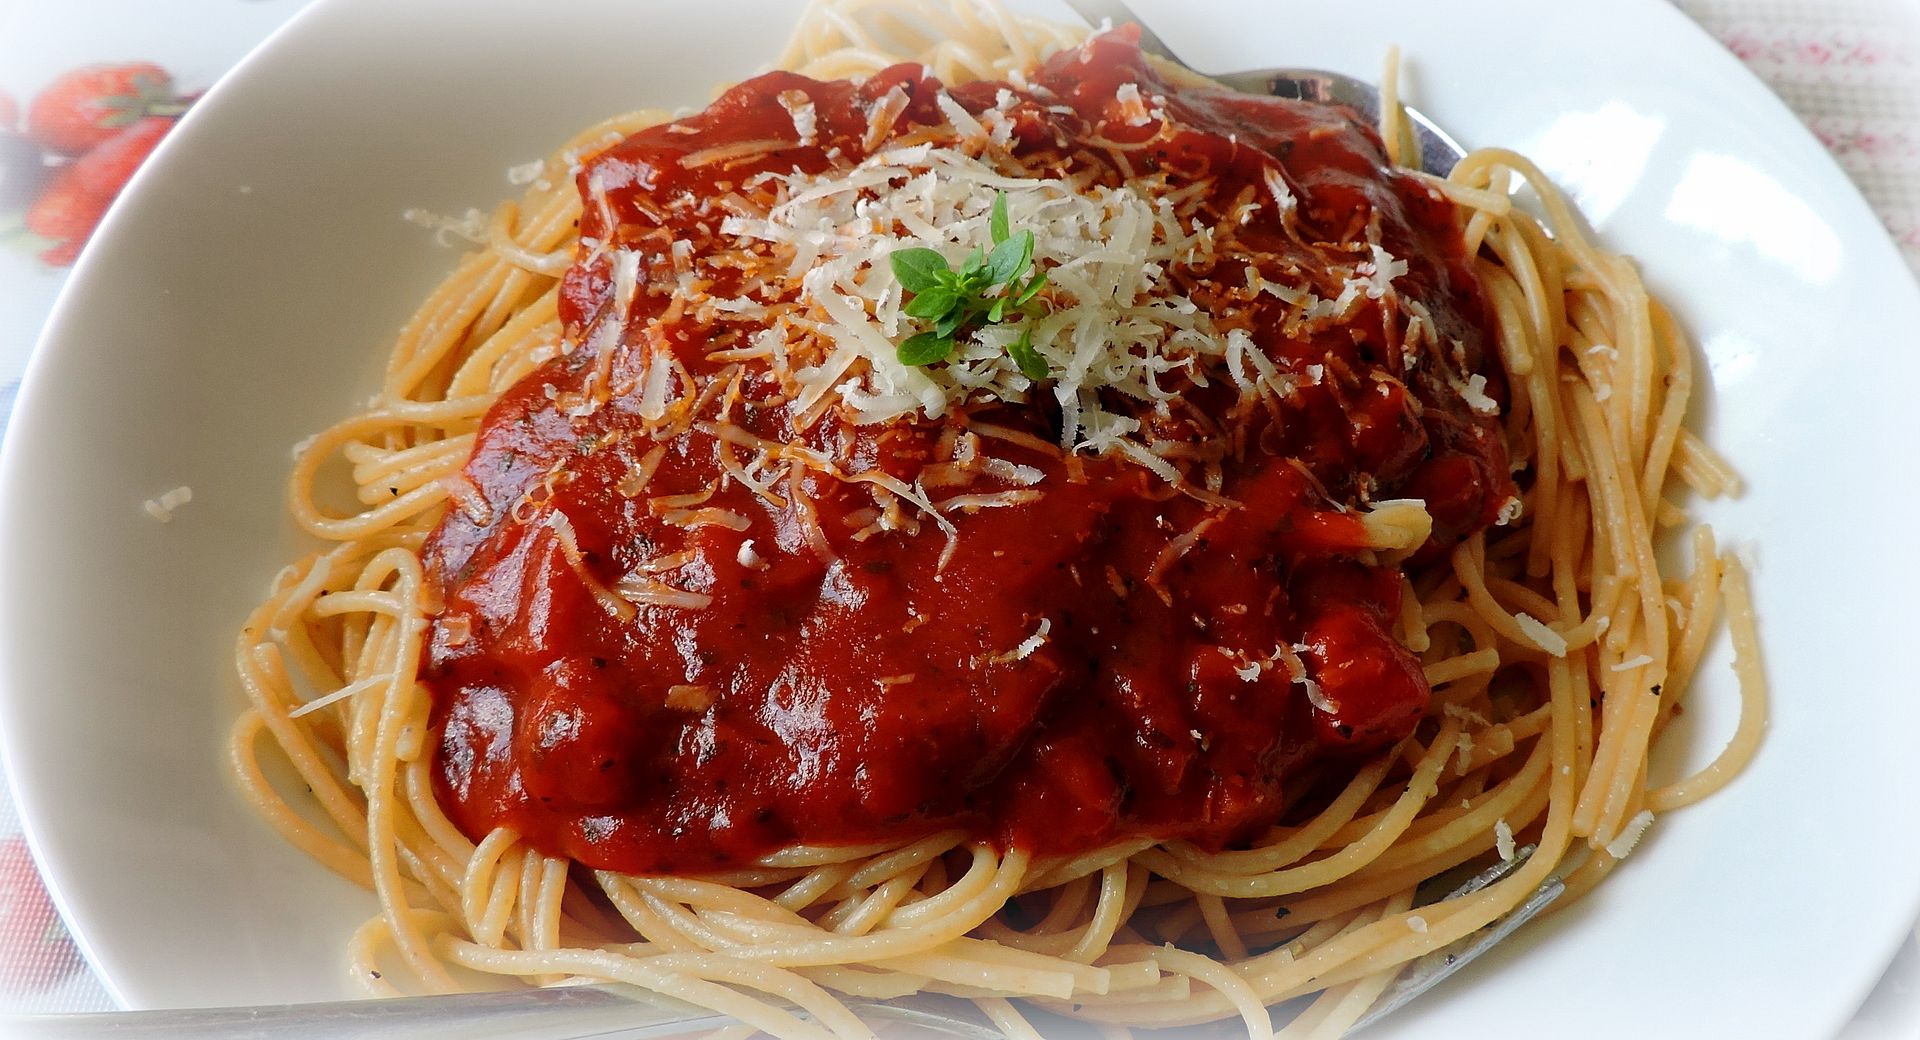
I love this time of year when we blessed enough to be enjoying an abundance of fresh local produce! I grew my own tomatoes this year and I have to say I did a really great job of it! (Not to brag or anything!) I took advantage of some of them, as well as some which I bought to make up the difference, to make a delicious homemade crock-pot marinara sauce.
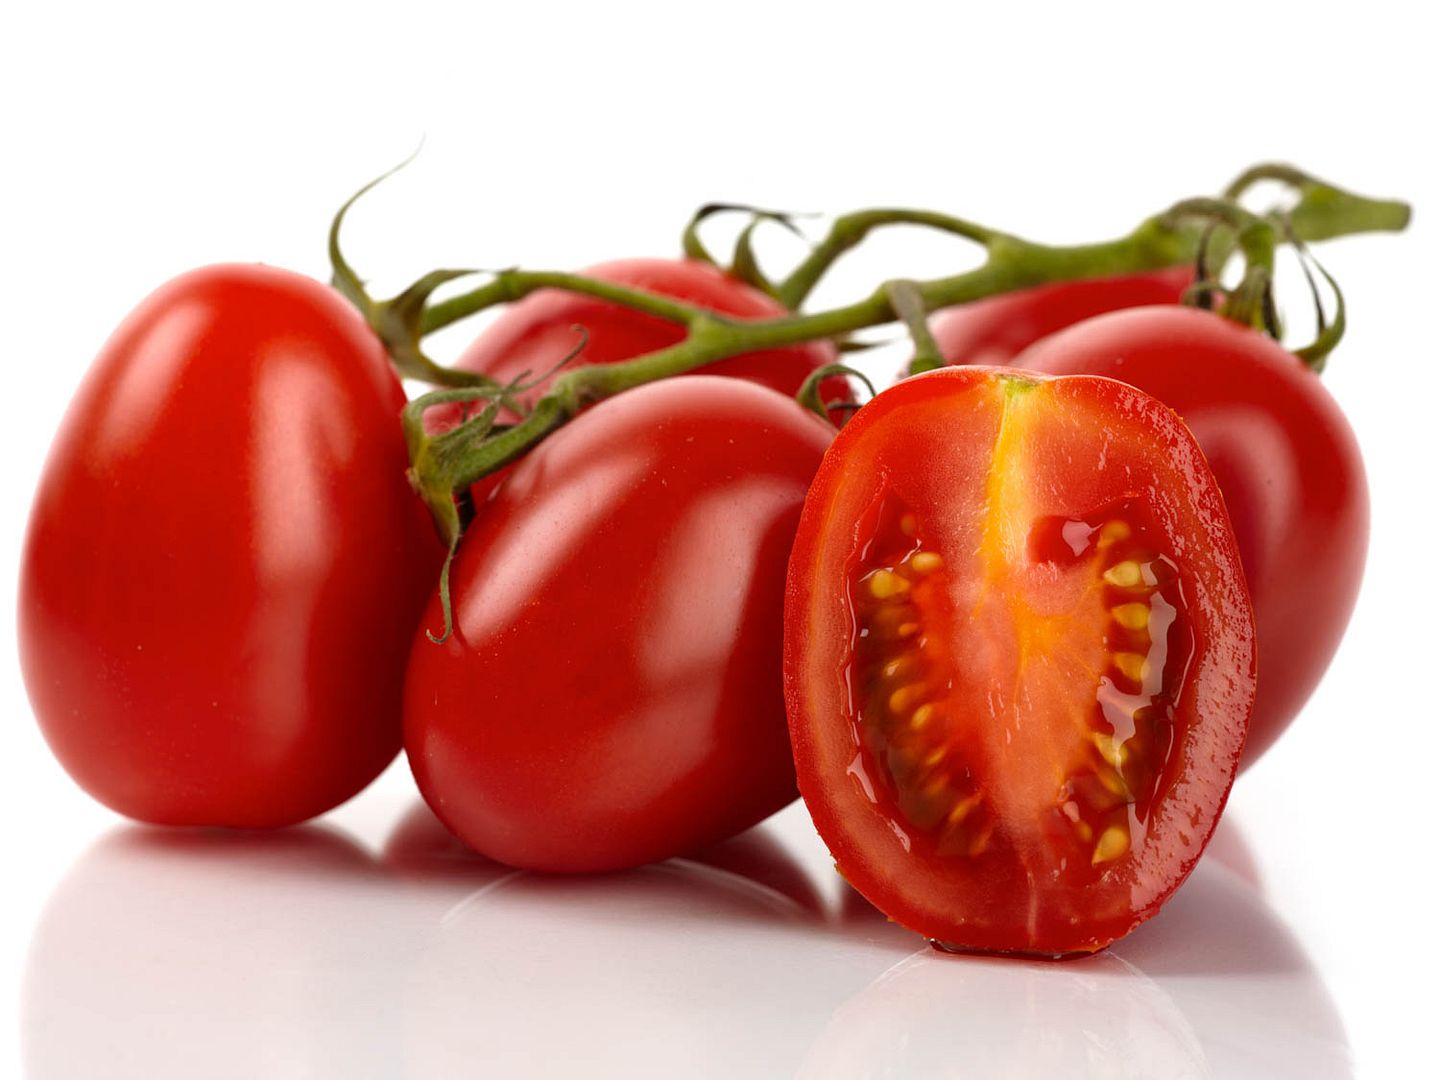
There is no greater taste on earth than fresh garden tomatoes, picked and eaten on the day with the warmth of the sun still on their skins. A delicious sauce made with them is also a real treat and even more so when you take advantage of the slow cooker and let it do all the work for you!
I like to peel my tomatoes first. It's quite easily to do. You just cut a small x into the base of the tomato opposite the stem end and plunge them into boiling water for a couple minutes, scoop them out into cold water and you will notice the skin already beginning to peel back from the x. Just take a sharp knife and the skins should slip right off with no problem.
I also like to scrape out and discard the seeds before cooking. This peeling and scraping makes a bit more work, but it saves work at the end. You can just cook the sauce with the skins and seeds, but then you would have to put it through a food mill at the end and to me it is just simpler to remove them from the very beginning.
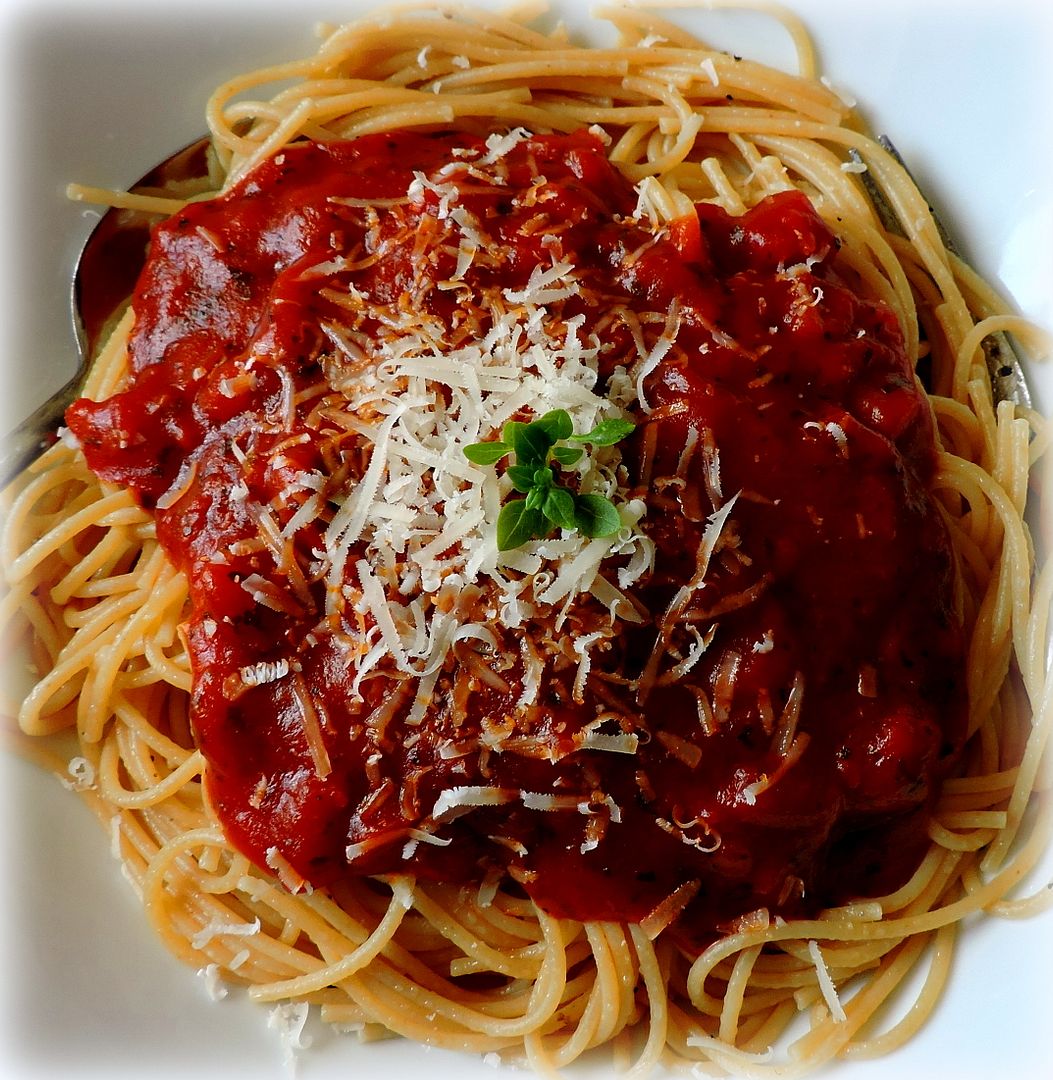
I also prefer my sauce to be a bit on the chunky side rather than pureed, so its just what works best for me. The longer you cook it, the thicker it gets, and the more concentrated the flavours.
I like to sweeten mine with a bit of honey, but you can leave this out as well if your tomatoes aren't that sharp. For myself, I really enjoy a bit of sweetness. In any case I do hope you will give this a go and that you will enjoy it! If you don't have your own grown tomatoes, you could substitute 4 small tins of chopped tomatoes (14 ounce tins/400g), or two larger ones, undrained. (28 ounce tins) Enjoy!
This makes a great all round tomato sauce with lovely flavour. The longer you cook it the thicker it will get. I think it is delicious. I like to freeze it in half pint/1 cup containers. It's a great way to use up the glut of tomatoes in the garden!
5 to 6 pounds ripe plum tomatoes
60ml red wine (1/4 cup)
3 cloves garlic, peeled and crushed
1 medium onion, peeled and finely chopped
1 medium carrots, peeled and finely chopped
2 TBS Extra Virgin Olive oil
1 bay leaf
2 TBS chopped fresh parsley
1 TBS chopped fresh basil
1 tsp chopped fresh oregano
1 tsp chopped fresh thyme
1/2 tsp chopped fresh rosemary
pinch red pepper flakes
salt and black pepper to taste
1 TBS honey to sweeten if desired
Prepare your tomatoes by cutting an x in the bottom of each and blanching them for 2 minutes in boiling water. Remove and plunge into cold water. Peel and discard the skins. (The skins should slip off very easily.) Cut into quarters. Scrape out and discard any seeds. Place into a large crockpot along with the garlic, onions, carrots, olive oil and herbs. Drizzle with the wine and olive oil. Cover and cook on low for 4 hours, stirring occasionally. Mash the tomatoes down with a potato masher. Cover again and cook for a further 4 to 6 hours until thickened. Taste and adjust seasoning with salt, pepper and pepper flakes. Add the honey and heat through.
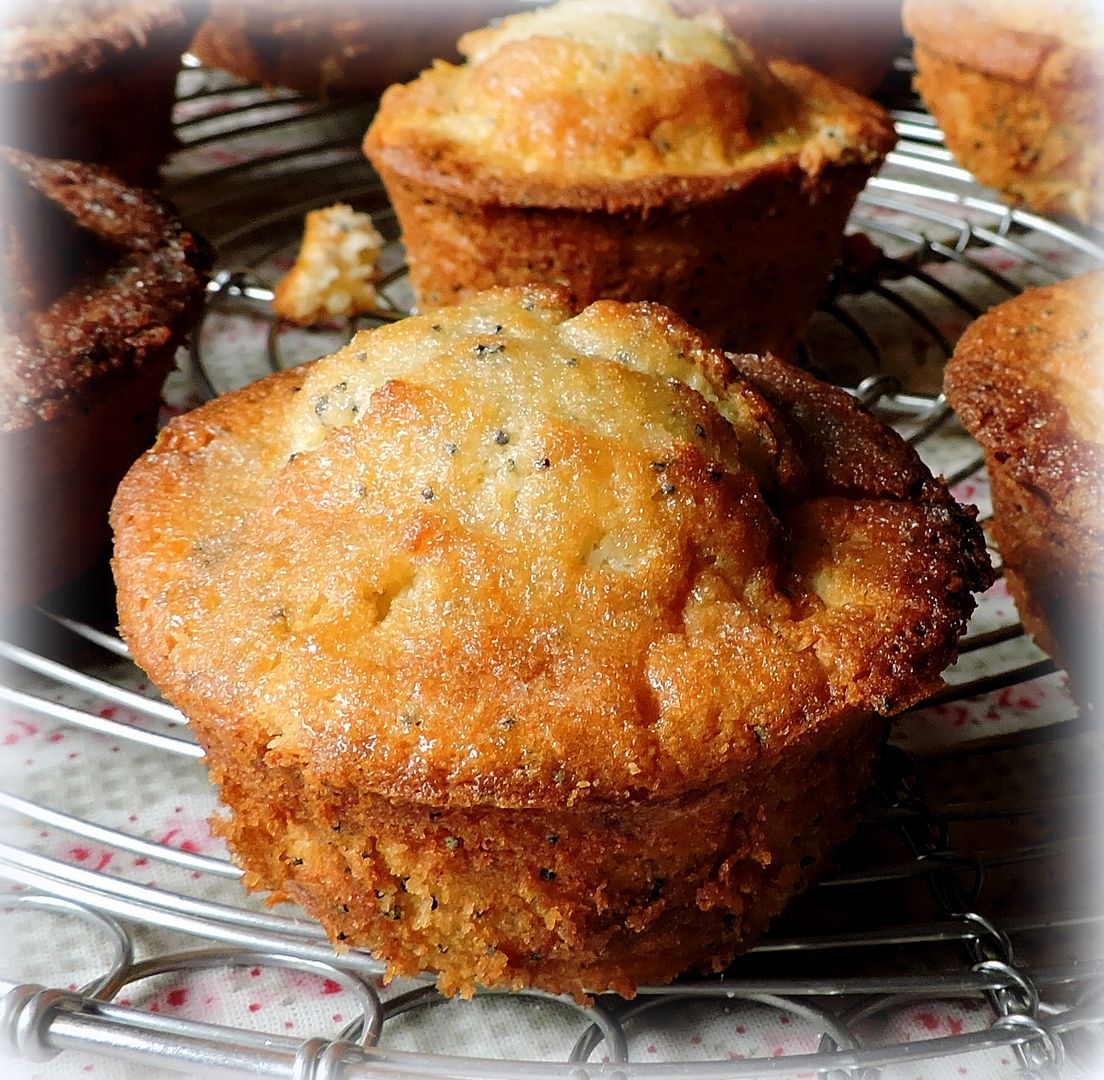
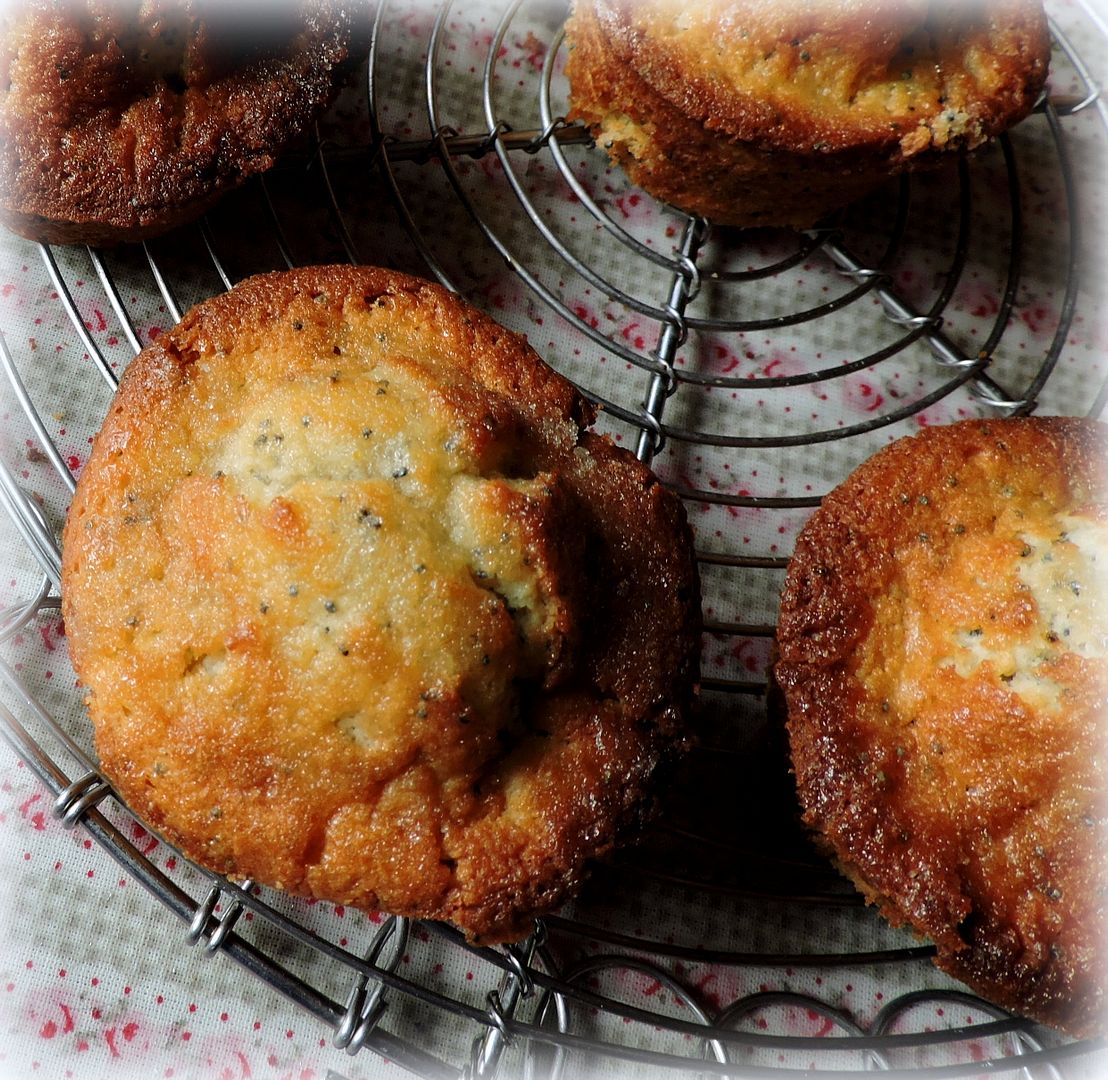
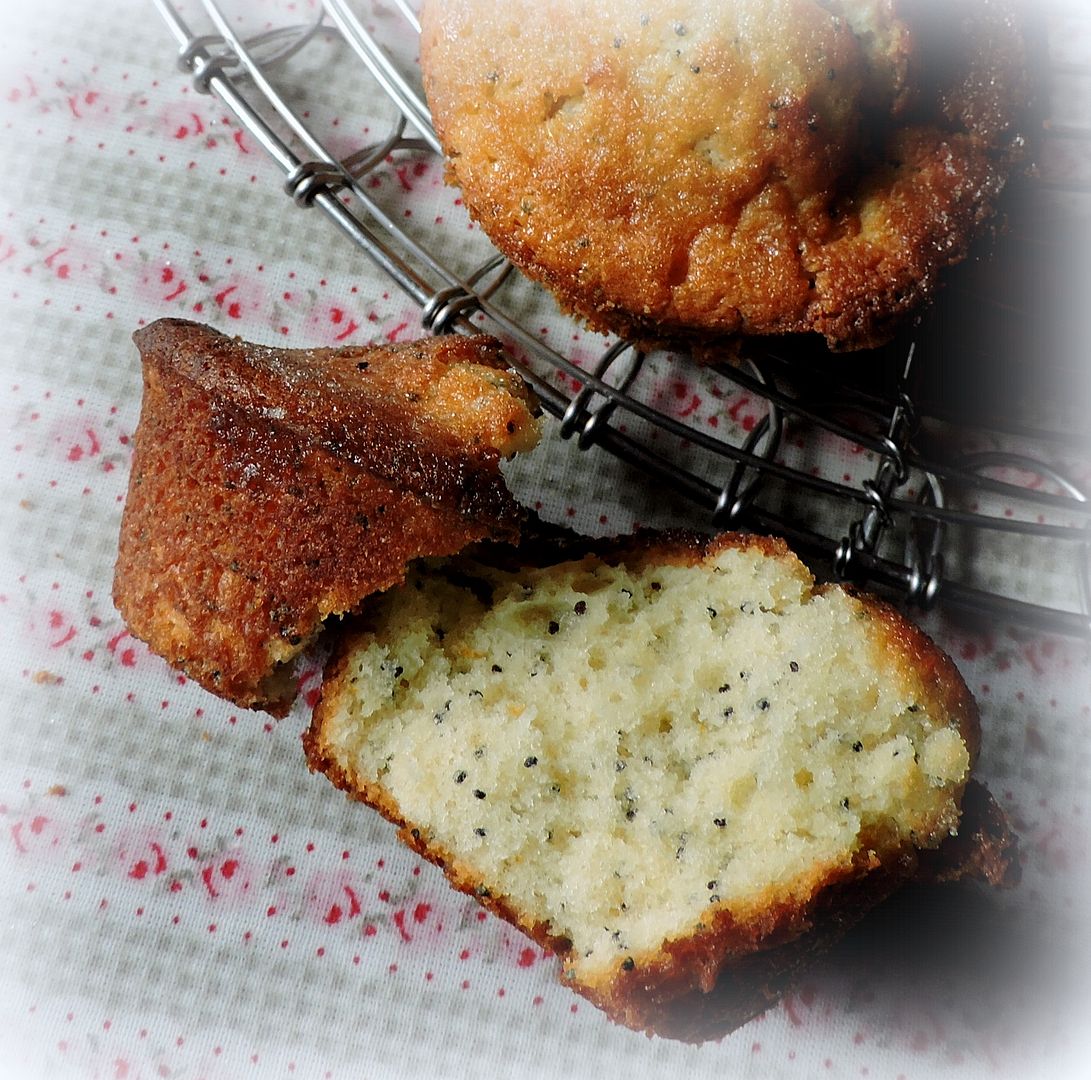
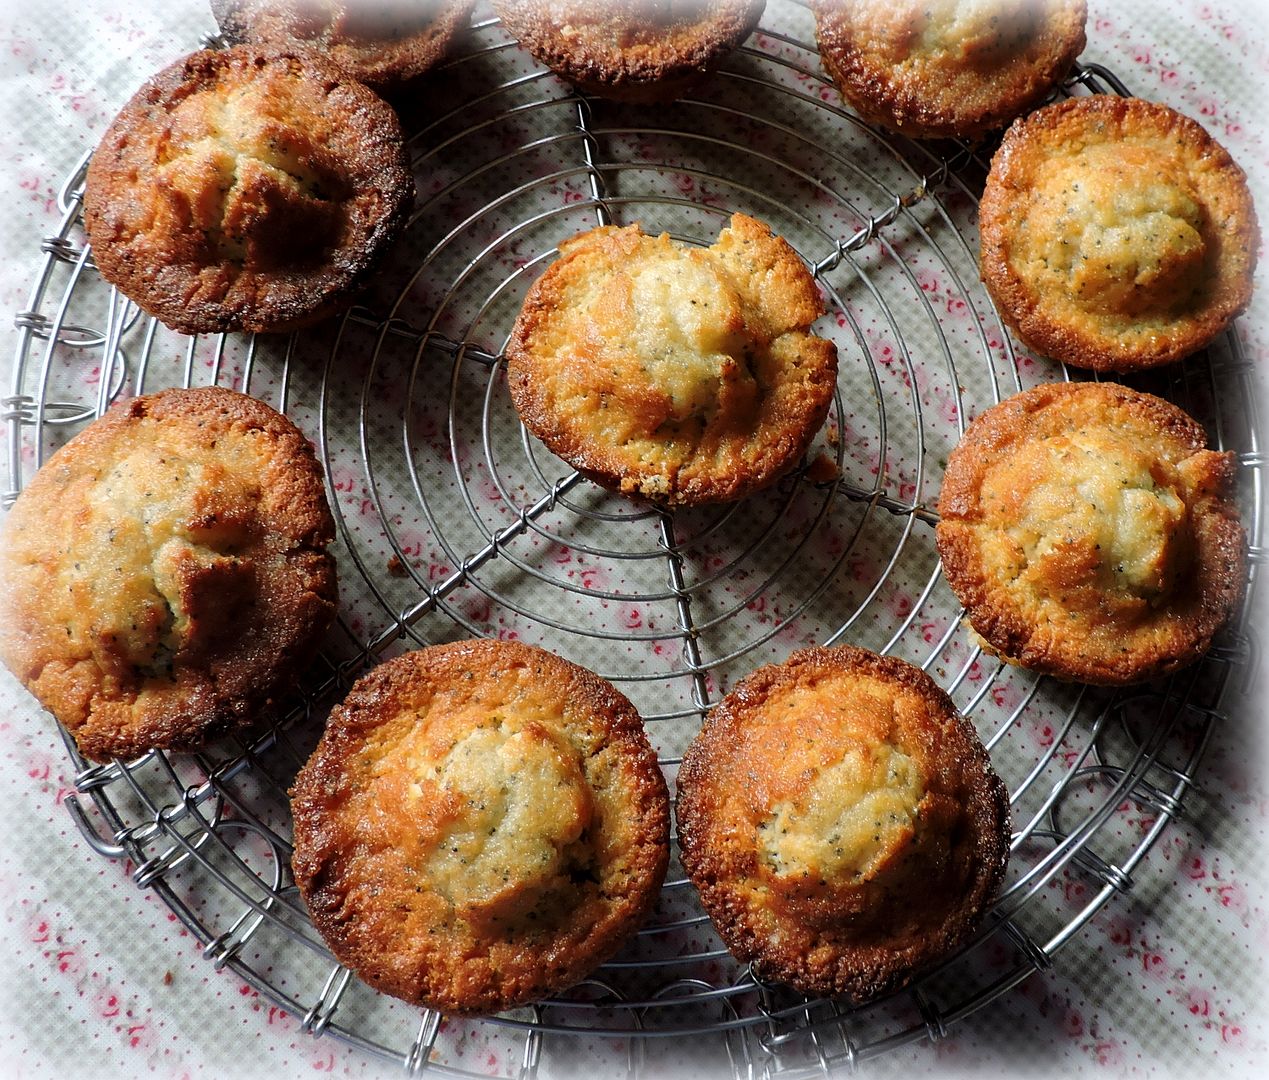
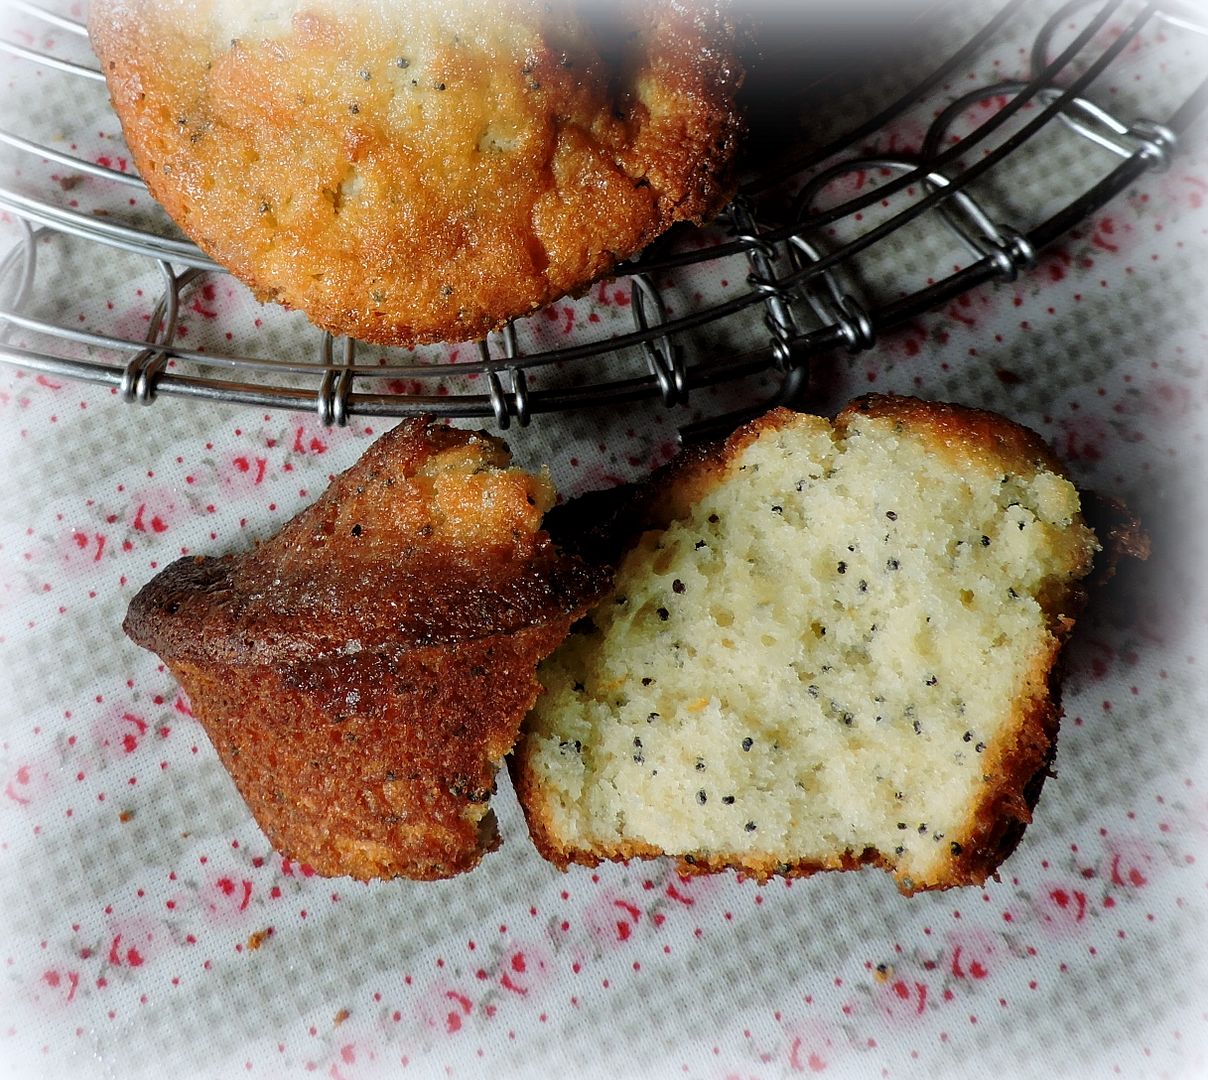
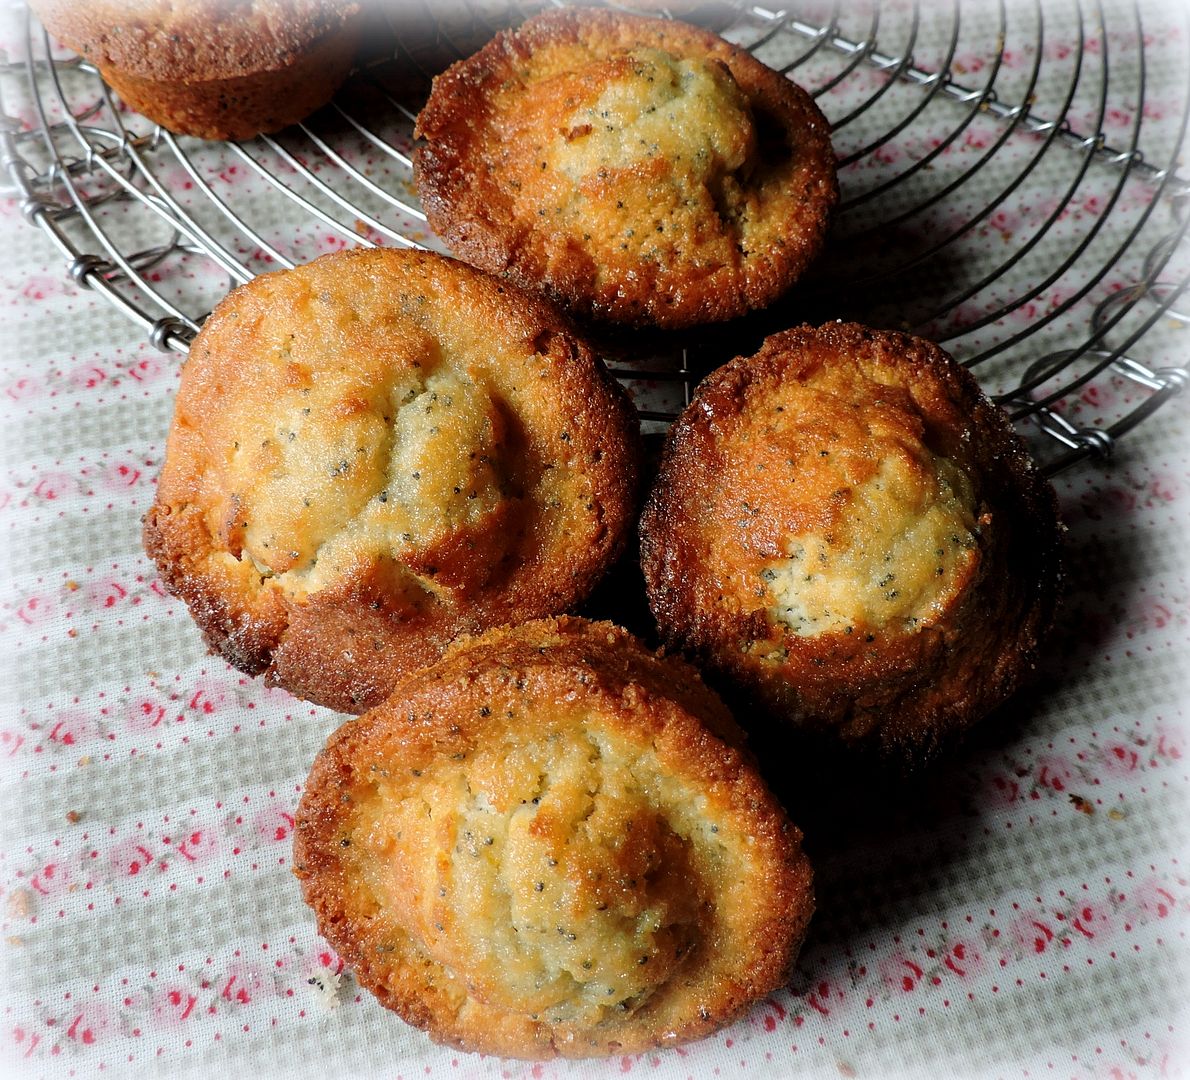
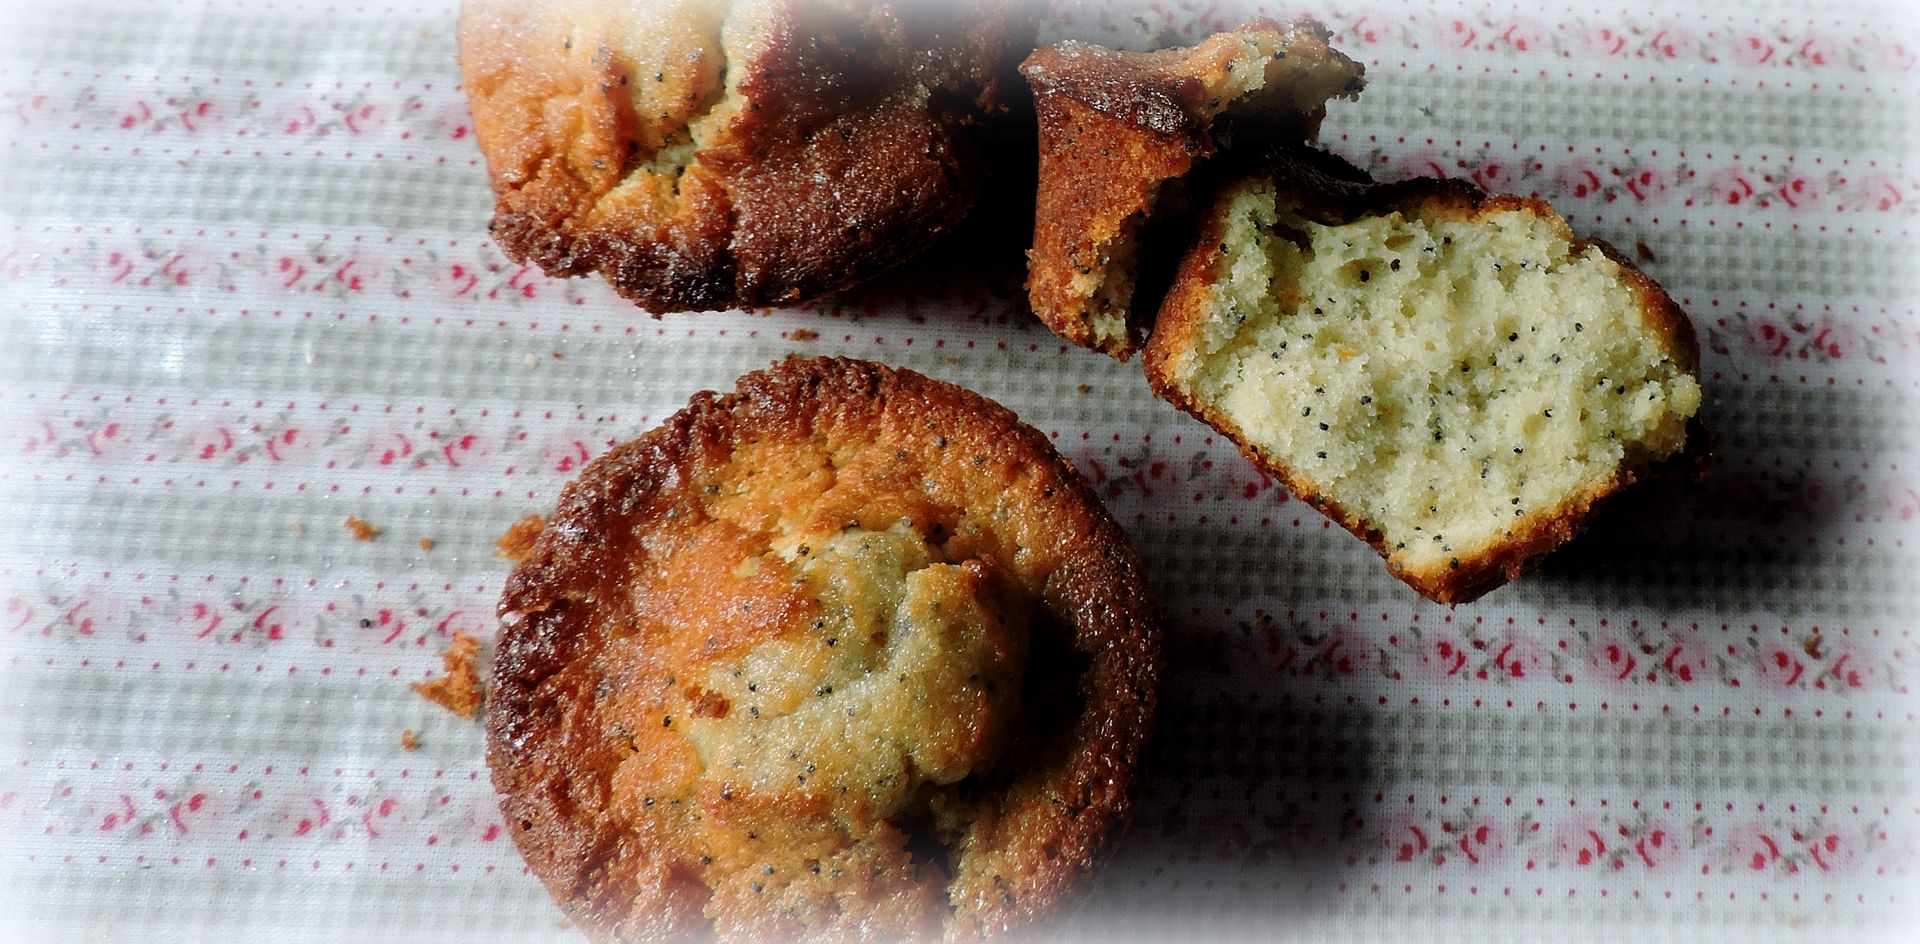
I am not sure what it is about poppyseeds, but I love anything with poppyseeds in them. When I lived out West we used to be able to buy the best poppyseed sweet buns at the grocery store bakery in Medicine Hat. They were to die for! I have been craving them ever since! I will have to find myself a recipe one day and make my own. These muffins are not quite buns, but they are quite delicious in a different sort of way!
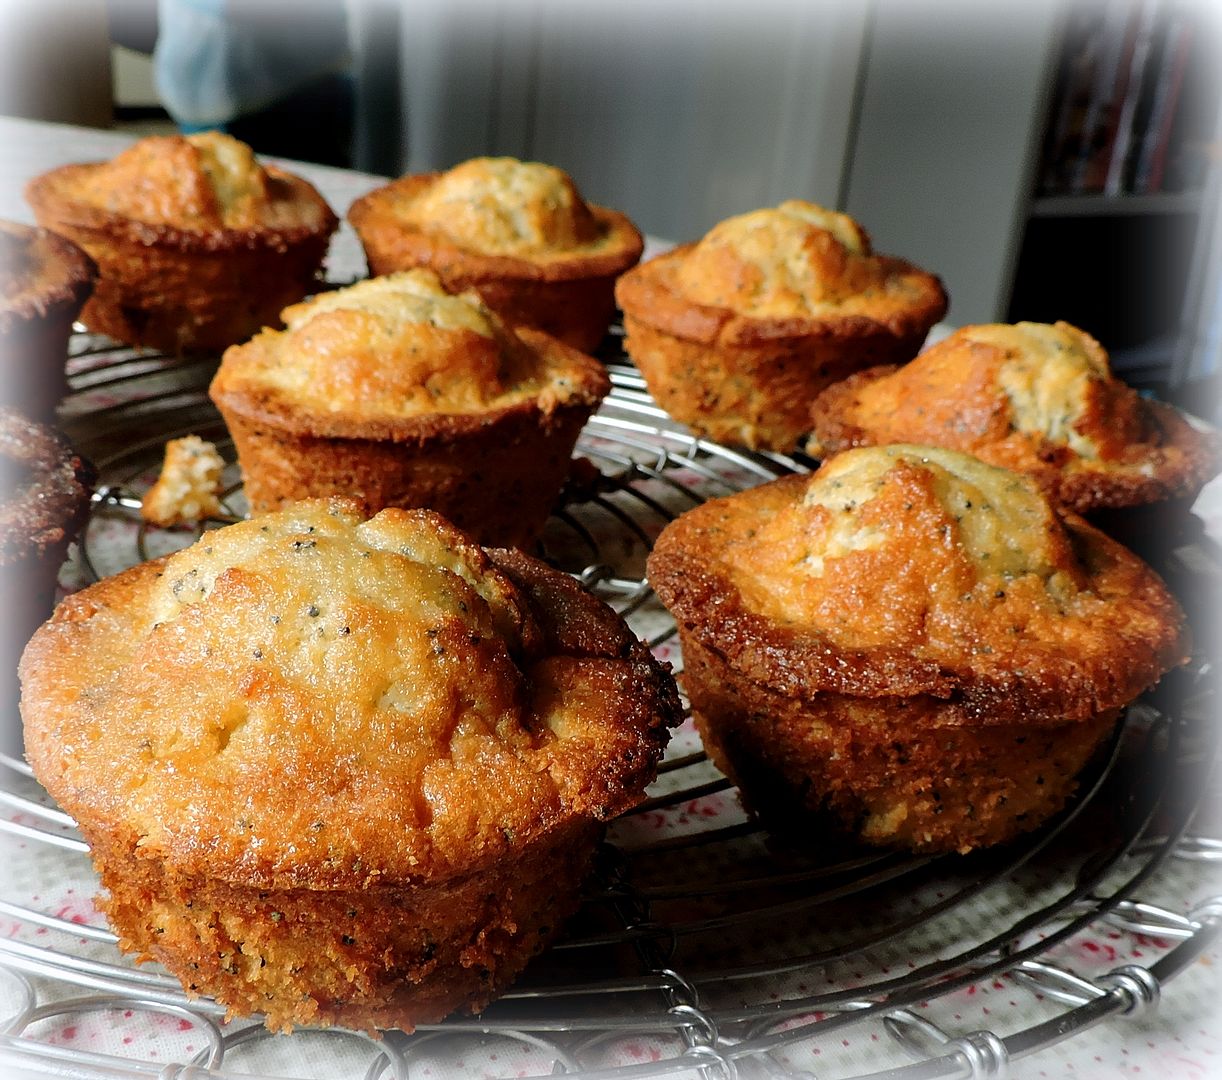
They really are fabulous muffins, with a lovely orange flavour. There is a whole TBS of orange zest in them. This really gives them a nice bright flavour!
I like to add an orange glaze to brush on the hot muffins which adds an additional level of orange flavours and some moistness. It's optional though so you can certainly leave it off if you wish and the muffins will still be great!
The poppy seeds add a bit of colour and crunch! Nice, nice!
They have a beautiful texture. Nice and light! Not heavy in the least. Just like little puffs of air. I hope you will give them a go! You won't be sorry!
These have a lovely fresh flavour and I love the crunch of the poppyseeds. I have added an additional orange sugar glaze that you can brush on while they are still warm. You can also do these with lemon or tangerine zest instead.
175g of plain flour (1 1/4 cup)
1 1/4 tsp baking powder
1/2 tsp baking soda
1/4 tsp salt
120g butter, room temperature (1/2 cup)
144g of caster sugar (3/4 cup)
2 large free range eggs, separated
1 TBS freshly grated orange zest
1 tsp vanilla
120ml of buttermilk (1/2 cup)
2 TBS poppyseeds
For the optional glaze:
65g caster sugar (1/3 cup)
2 TBS orange juice
Preheat the oven to 200*C.400*F. gas mark 6. Butter a muffin tin really well which has 3 by 1 1/2 inch holes. Set aside.
Sift together the flour, baking powder, soda and salt. Set aside.
Cream the butter and sugar together until light and fluffy. Beat in the egg yolks, one at a time. Beat in the fruit zest and vanilla. Add the dry ingredients alternately to the creamed mixture, with the buttermilk, beginning and ending with the dry. Stir in the poppy seeds.
Beat the egg whiles until soft peaks form. Fold them into the batter. Divide equally amongst the prepared muffin cups.
Bake for 20 minutes, until well risen and a toothpicket inserted in the centre of one comes out clean.
Put the sugar and orange juice for the optional glaze in a small boil. Heat in a microwave for about 30 seconds to melt the sugar. Brush over the hot muffins while they are still in the tin. Tip out onto a wire rack and cool.
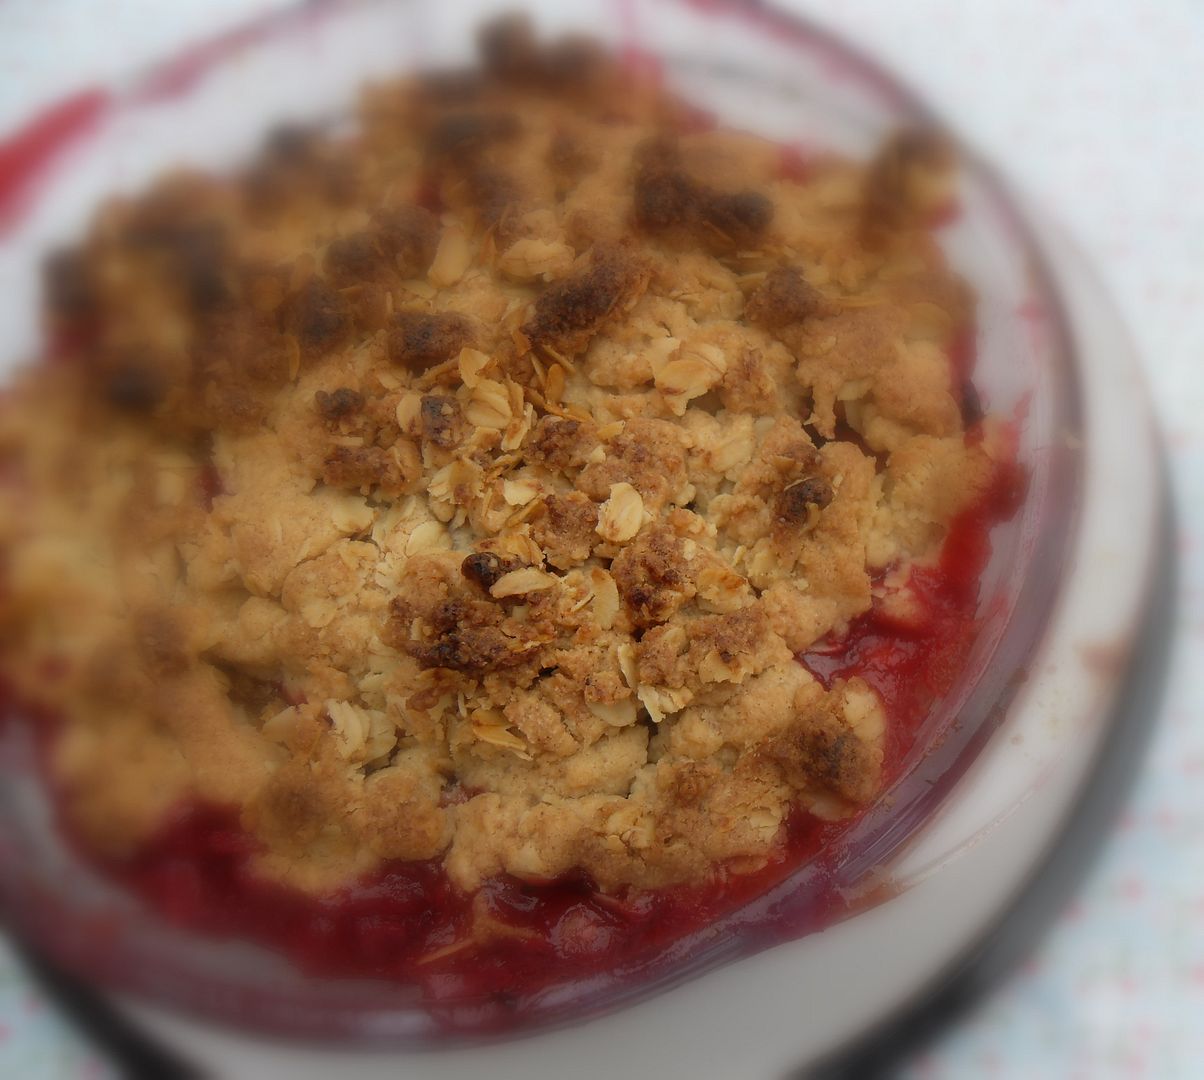
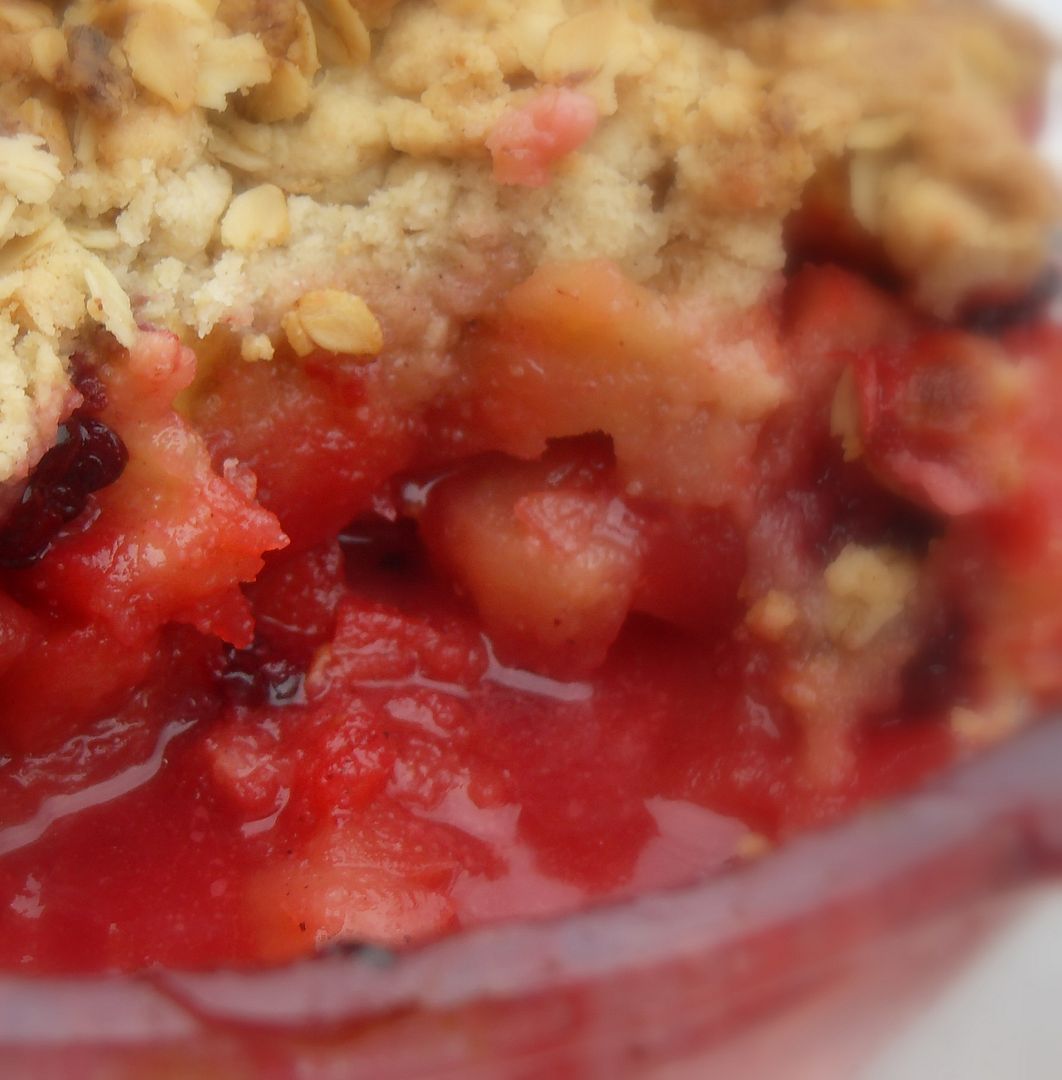
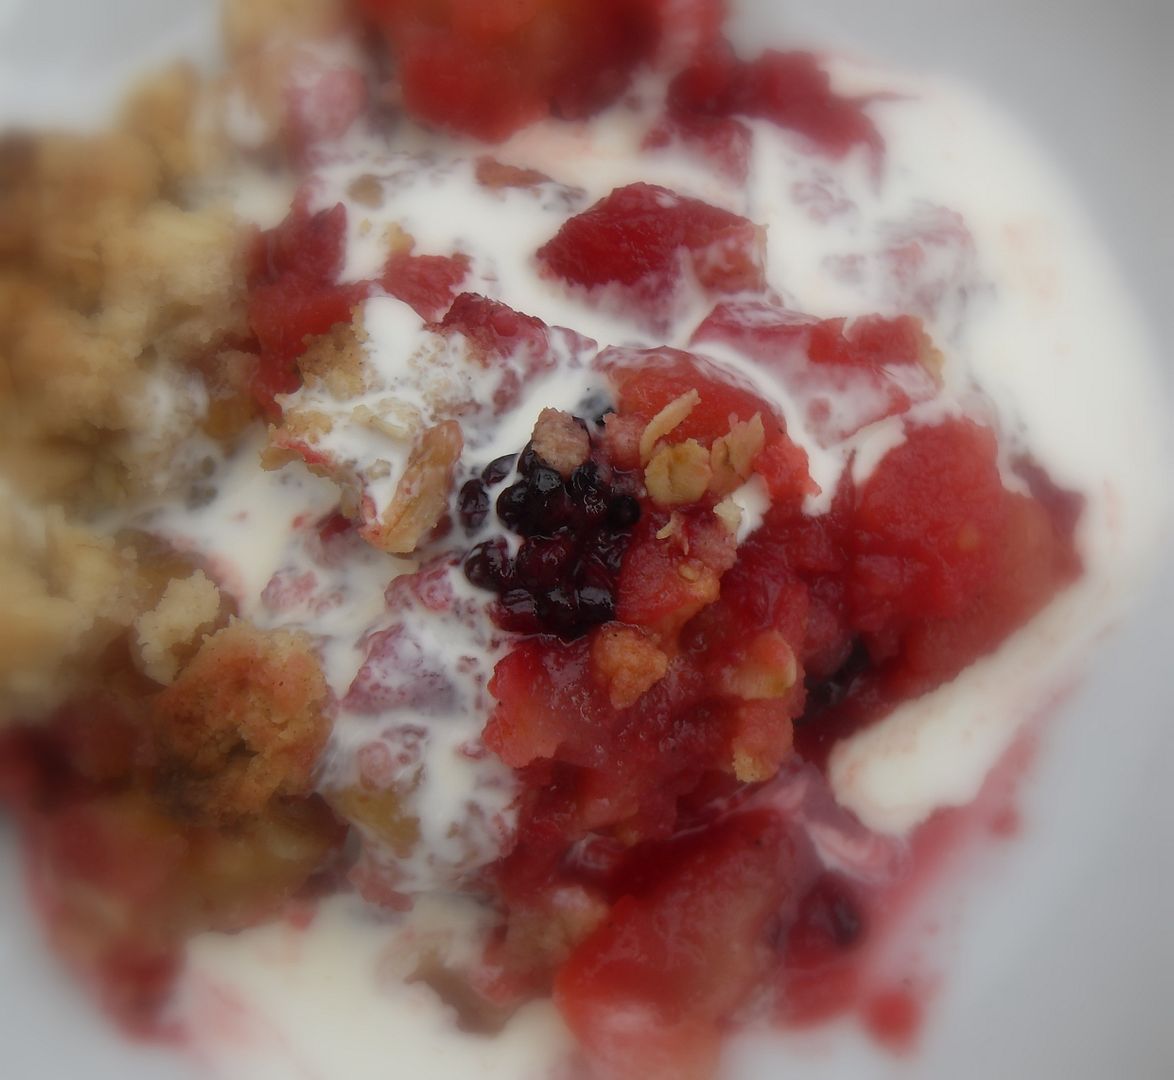
There is no dessert that Todd loves more than a good crumble. Apple. Blueberry. Strawberry rhubarb . . . if it has crumble in the name, Todd loves it. Well, maybe not as much as the memory of his mother's apple pies, but almost!
I think that next to Apple Crumble (which is right up there with apple pie for him) he loves Blackberry and Apple Crumble the best. And this is a particularly lovely version.
The filling is composed of not just one, but two varieties of apples. A good cooking apple (over here I would suggest Bramley apples), and a good eating/dessert apple. (Cox is nice)
I then like to add a bit of spice . . . along with some sugar. (I used demerara, but you could use the equivalent of soft light brown sugar.) Cinnamon, nutmeg, ginger and cloves. But that isn't my only secret to deliciousness here . . .
I also add a layer of crumbled marzipan before I put on that oaty buttery topping! I think the flavour of buttery toasty oats cannot be beat, unless you add a tiny bit of warmth from some home sweet home spicy cinnamon . . . along with a hint of lemon via some finely zested lemon peel.
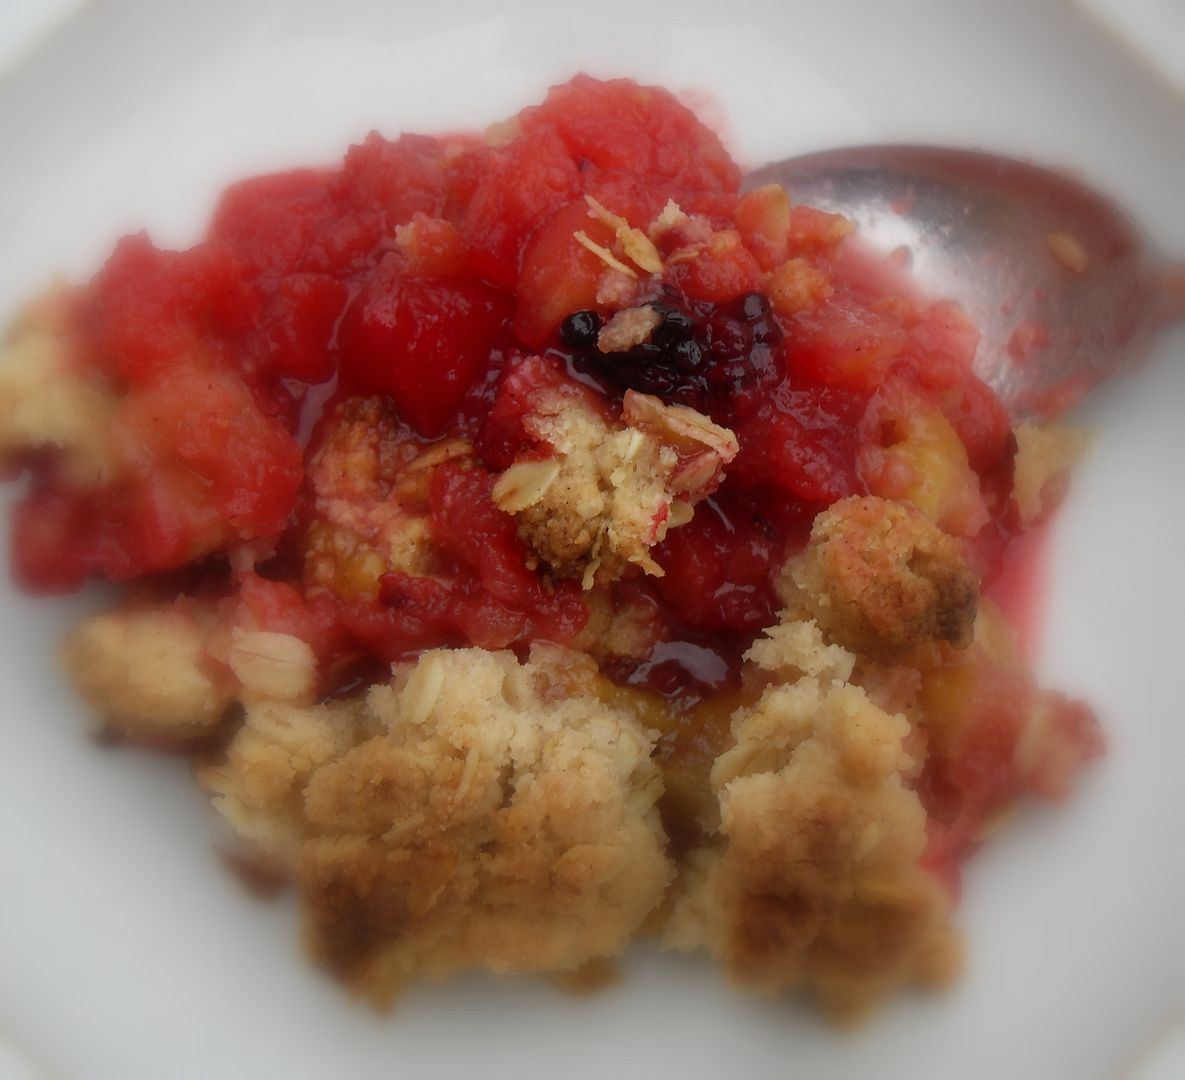
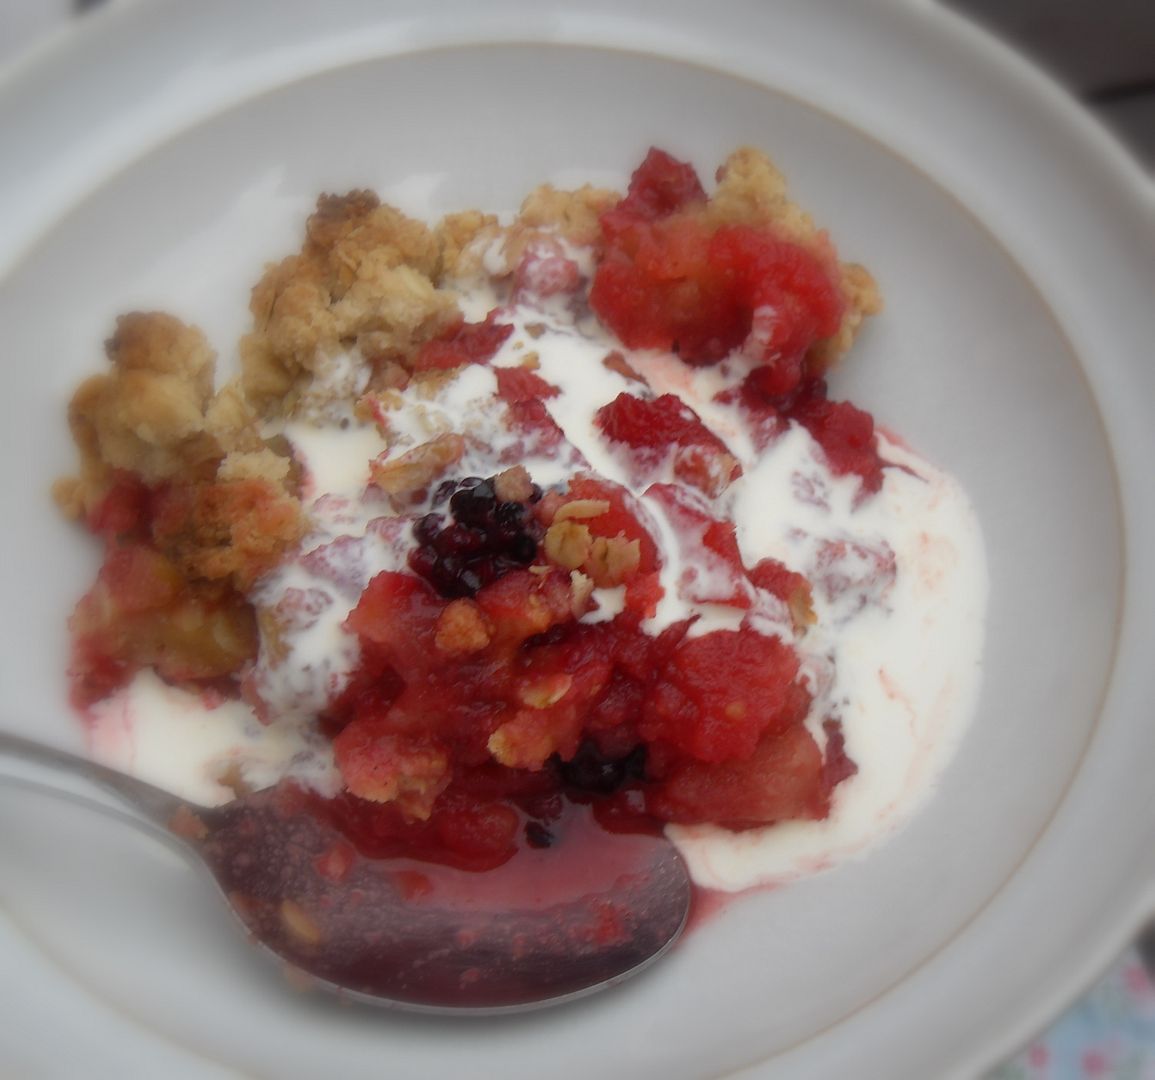
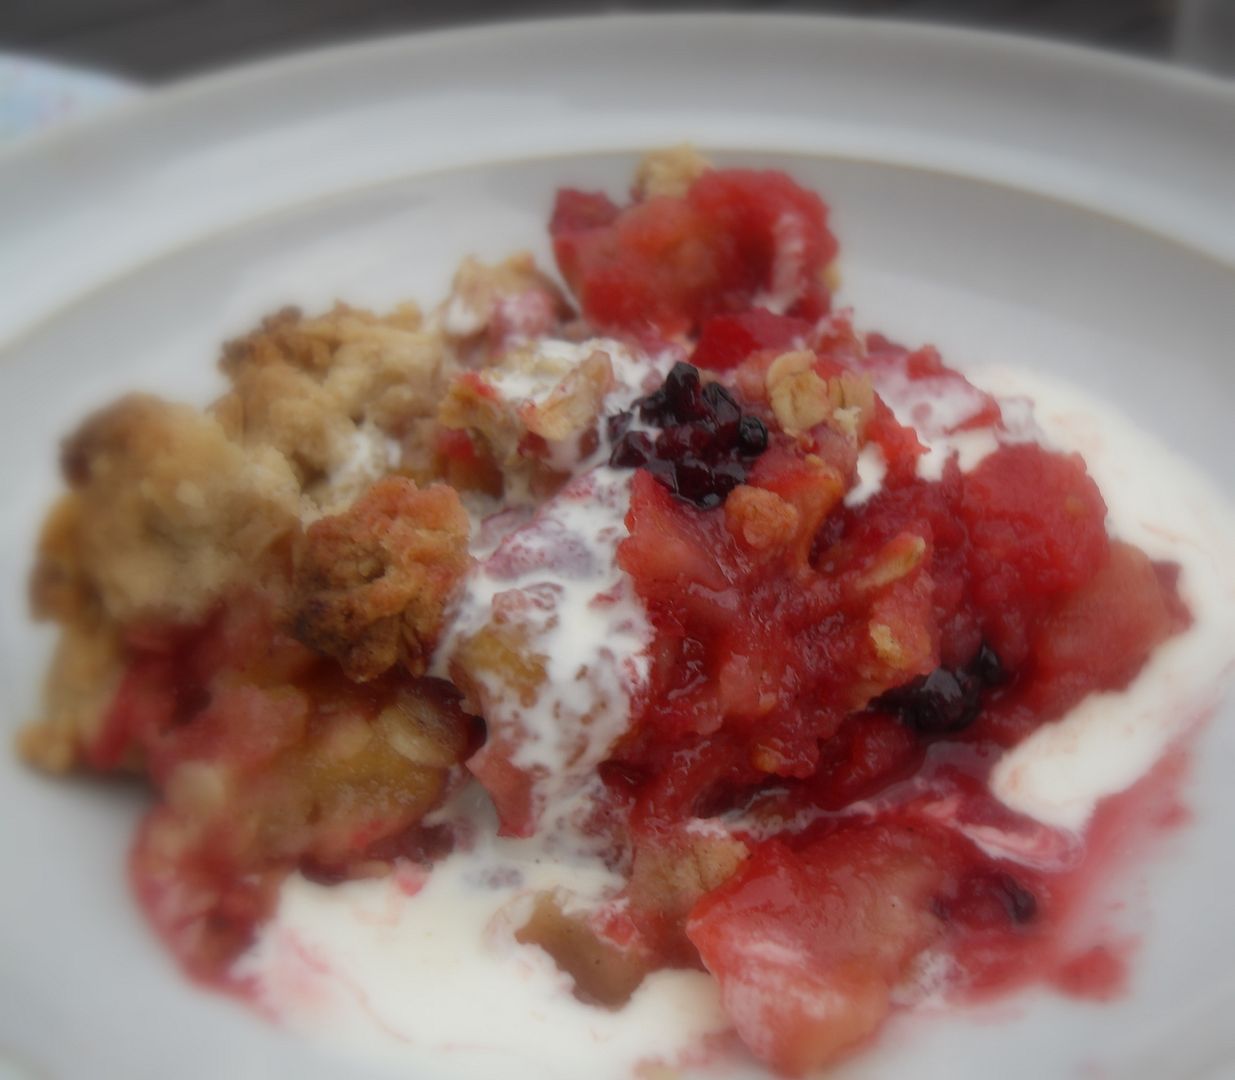
Oh my, this is deliciously scrummy! The tartness of the fruit, all spicy and slightly sweet . . . the colour . . . ruby and deep purple . . . those moreishly tasty pockets of marzipan which melt down into all that ruby tart/sweet goodness . . . and that buttery oaty spicey lemony crumble topping . . . G-O-R-G-E-O-U-S!!
If you only make one crumble this year, and you really should . . . let it be this one. Seriously. It is truly fabulous!!
*Blackberry, Apple and Almond Crumble* Serves 6 to 8
This is one very scrummy crumble! From it's delicious filling of apples, blackberries and marzipan, to it's buttery oaty topping, this is a winner all the way around!
3 Bramley apples (large cooking apples) 2 eating apples the juice of one lemon 200g blackberries (about a heaped cup-full) 1/2 tsp ground ginger a pinch of ground cloves 1/4 tsp ground nutmeg 1/2 tsp of ground cinnamon 100g demerara sugar (1/2 cup, turbinado sugar) 200g marzipan (about 1/2 lb crumbled)
For the topping: 200g chilled butter, diced (about 7 ounces) 250g plain flour (2 1/2 cups) 50g demerara sugar (1/4 cup, turbinado) 1 tsp ground cinnamon the grated zest of two unwaxed lemons
100g rolled oats (1 cup)
To serve: pouring cream warm Custard or Ice Cream
Preheat the oven to 200*C/400*F/ gas mark 6. Peel, core and dice all of the apples. Place into a large baking dish. (1.6 litre or 2 quarts) Squeeze the lemon juice over all. Stir together the sugar and spices. Stir into the apples and then gently fold in the blackberries. Set on a baking sheet.
Measure the flour into a large bowl. Whisk in the cinnamon. Rub in the butter to make a coarse crumbly mixture. Stir in the sugar, oats and lemon zest. Set aside.
Chop up the marzipan and sprinkle evenly over top of the fruit. Crumble the flour mixture evenly over top.
Bake for 45 minutes, until the topping is golden and the fruit is juicy, tender and bubbling. Allow to sit for 5 to 10 minutes to cool, then spoon out into serving dishes and serve warm with pouring cream or custard. (or ice cream!)
For nearly 100 years, people have been flocking to Yorkshire for a taste of Bettys. Bettys was founded by Frederick Belmont, a Swiss baker and confectioner who came to England in search of opportunities to develop his craft skills. He opened his first Café Tea Rooms in Harrogate in 1919 and named it 'Bettys'. The reason why remains a mystery to this day.
Lots of things have changed since then. They now have six Café Tea Rooms in Yorkshire and the Bettys name has become famous the world over. They have also added a mail order service which delivers deliciousness to homes from Tunbridge Wells to Tokyo, and they share their knowledge and passion for food through Bettys Cookery School.
But in other ways, they are unchanged. Still family-owned, they believe in doing business in a way that is fair to people and kind to the planet. And at their Craft Bakery in Harrogate they still practice the artisan skills that Frederick Belmont brought to Yorkshire from Switzerland nearly 100 years ago.
Its now Great British Bake Off Season here in the UK, and in honor of that each week Betty's will be sharing a delicious recipe, plus a video and their baking tips to go with each recipe. The kind of thing you won't find in any cookery book!
This week they are sharing their recipe for Classic Bread Rolls with us. After watching the video, I think even I will be able to bake us some lovely rolls!
selection of poppyseeds, sesame seeds, sunflower seeds
METHOD:
1. Place the flour and salt together in a bowl. Rub the butter into the flour using your fingertips until it is fully mixed through.
2. Add the yeast to the milk and water and mix with a fork. Allow to stand until the yeast has dissolved before adding this to the dry ingredients.
3. Gradually add the liquid to the dry ingredients, together with the dissolved yeast. Work the mixture together until it forms a ball of dough, and tip ou tonto a work surface.
4. Knead gently for about 10 minutes until the dough becomes soft and smooth.
5. Allow the ball of dough to rest under a slightly damp cklean tea-towel for 5 minutes.
6. Roll the dough into a sausage shape first and, using the scraper, divide th edough into 8 evenly sized pieces. Roll each into a round shape. Allow the dough to relax again for five minutes under a damp tea-towel or clingfilm before making each ball into a shape.
7. When the dough has been shaped, carefully place onto a baking tray.
8. Brush the dough with a little egg/milk mixture and sprinkle with seeds of your choice.
9. Place the tray in the prover or leave in a warm place covered with clingilm for about 20 minutes, or until doubled in size.
10.Bake the bread in a preheated oven at 200*C/400*F/ gas mark 6 (fan assisted) oven for 10 to 15 minutes, (depending on shape.)
11.The bread is baked when golden brown in colour and when tapped underneath they should sound hollow. Place on a cooling wire.
NOTES IN THE MARGINS ~o~Beautiful Bread~o~
KNEADING When kneading, always work the dough in the same direction. This will deveop the network of gluten strands.
To avoid sticking to your dough, use the one second contact rule - don't touch your dough for more than a second as you knead it
Imprint your dough with your thumb - if it springs back, its ready.
BALLLING OFF This stage is really important - what you're trying to do is trap energy in the dough.
When Lisa holds up the underside of the balled off dough, you can see the swirls of the core - yet the top is smooth.
The movement you're looking for is down and over. Notice in our film how Lisa pushes slightly down and she rotates the dough in her palm, travelling in the same direction.
HOMEMADE PROVER If you don't hav ea dedicated prover, few of us do, its easy to create one.
Simply take a bowl, turn it upside down in your sink, add hot water and your tray of dough, and cove rwith some cling fim.
Do you get tangled up in clingfilm? Than fold it back on itself to double line it - it prevents it from misbehaving!
FINISHING THE RACE Allow the dough a final 10% to finish the race. In other words, remove the dough from the prover a little before it has completely risen.
This is because the yeast needs a last bit of energy to take into the oven for a perfect rice.
COOLING When cooling your bread, make sure there's an airflor under the tray.
This prevents soggy bottoms!
Do check out the Betty's Baking Secrets Page, for a whole lot more baking secrets during the GBBO and beyond. Also don't forget to check back next week to see what's baking next! (With any luck I might even get it baked myself to show you my results! There is no rest for the wicked!!)
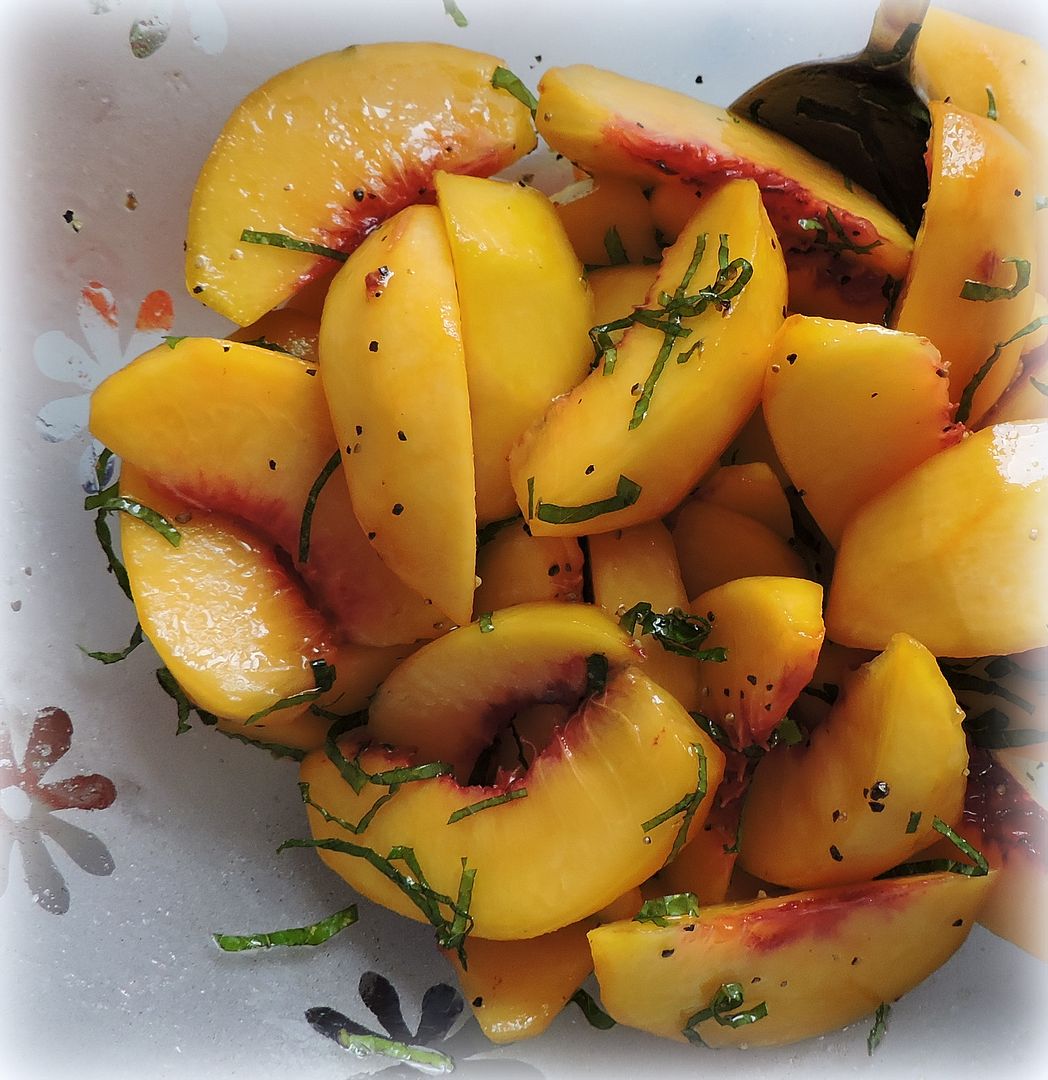
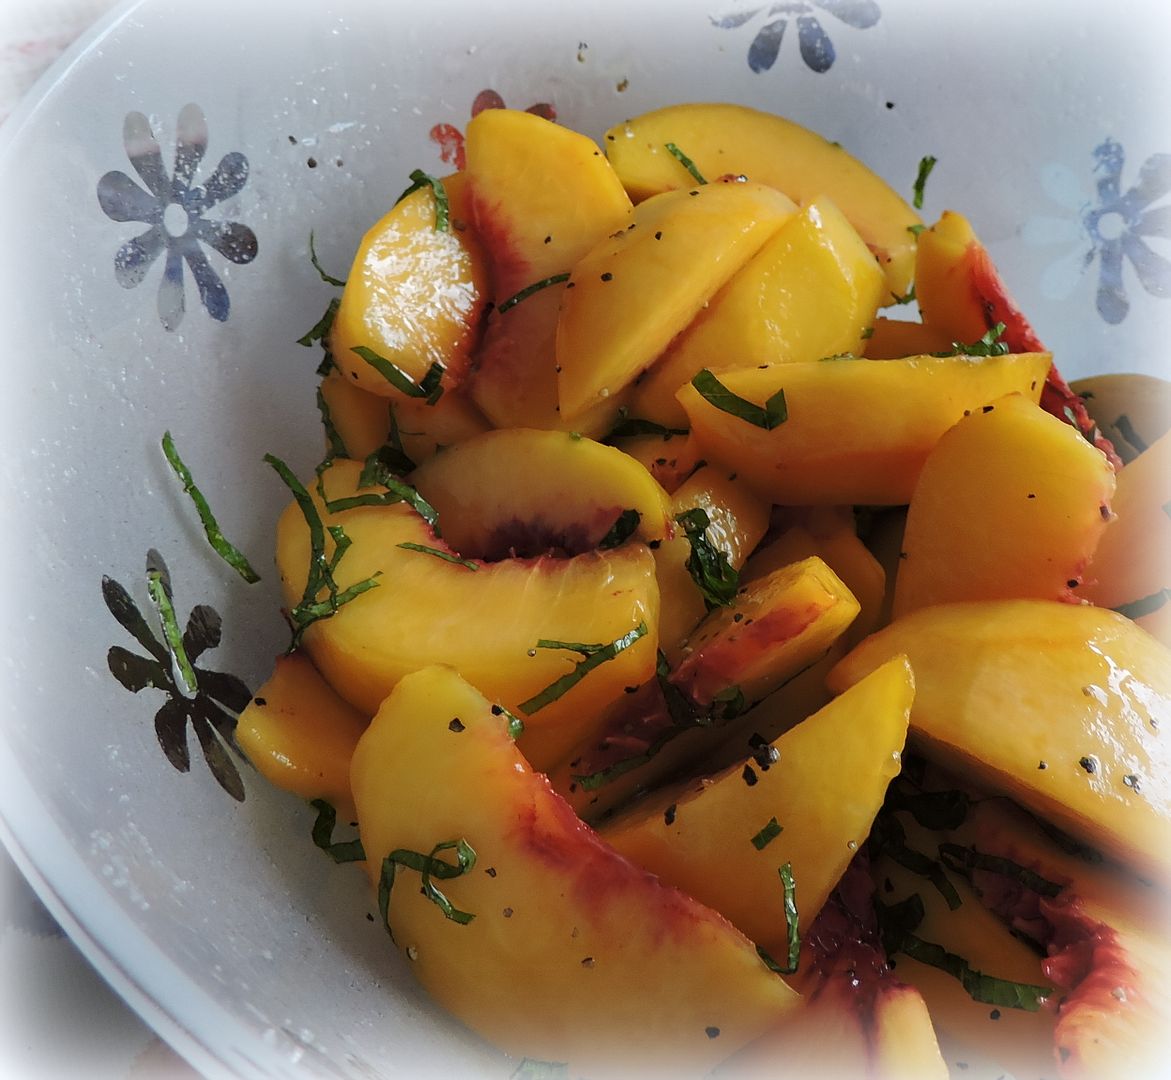
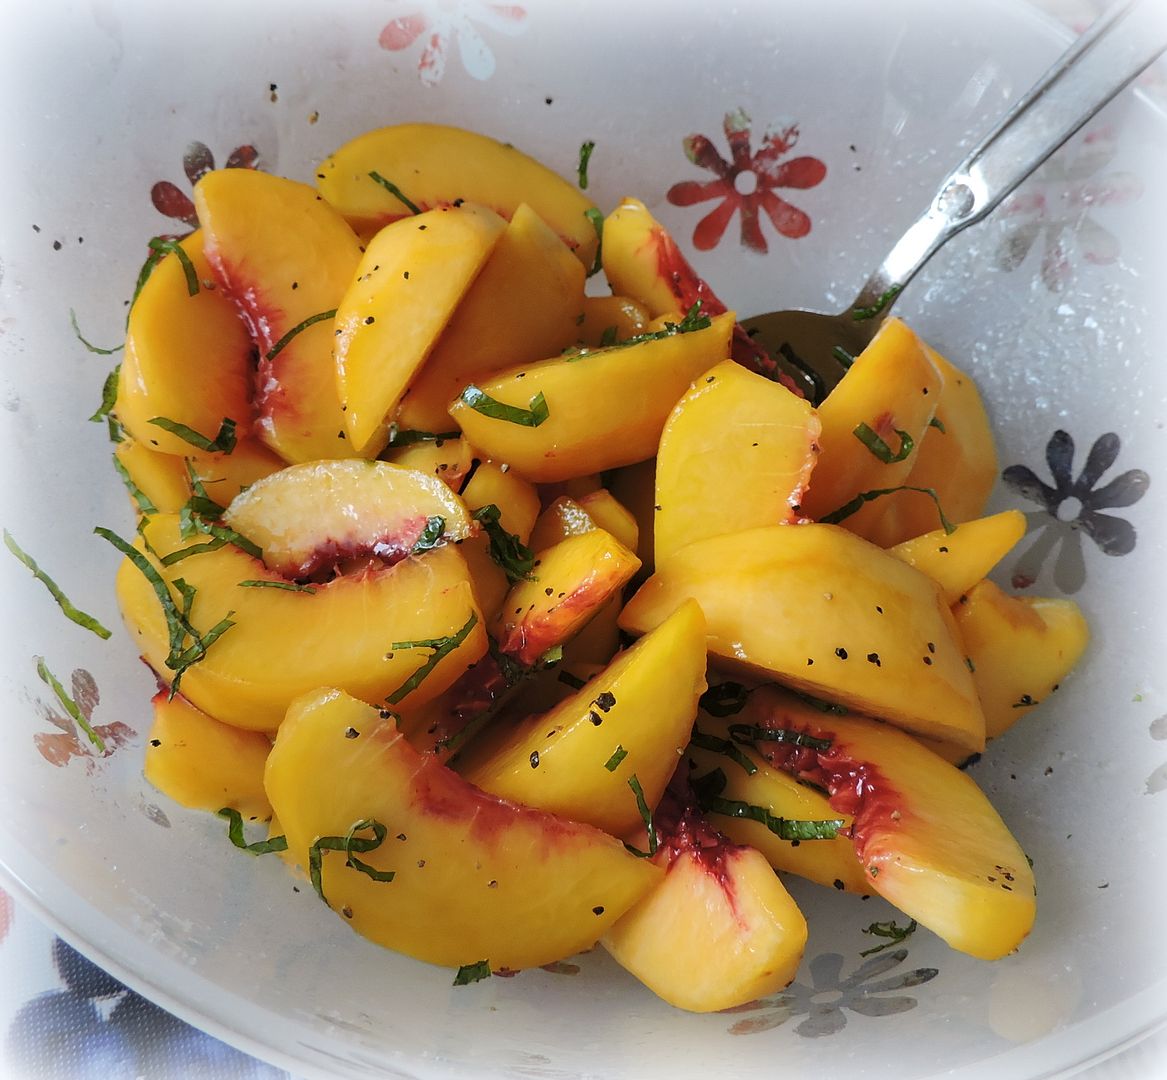
This lovely salad comes from a cookery book which I just love and can't recommend enough. Genius Recipes, by Kristen Miglore. Its a compilation of recipes that promise to rethink the way you cook. There hasn't been a dud in the bunch. I have loved every one I have tried, and this one here today is no exception!
I don't know if your grocery shops are like my grocery shops. Most of the fruit they sell at an affordable price is fruit you must ripen at home. So hard and green for the most part. They do sell already ripened fruit, but at a real premium price.
And yes . . . the most annoying thing of all is that it doesn't always ripen at home . . . going mealy and yucky and inedible instead of ripening properly. I get so angry when that happens because it is like pouring money down the drain, and so, I confess . . . if I want to eat a ripe peach or nectarine or plum . . . I will buy the ready to eat and already ripened ones. To me it has always been worth the price.
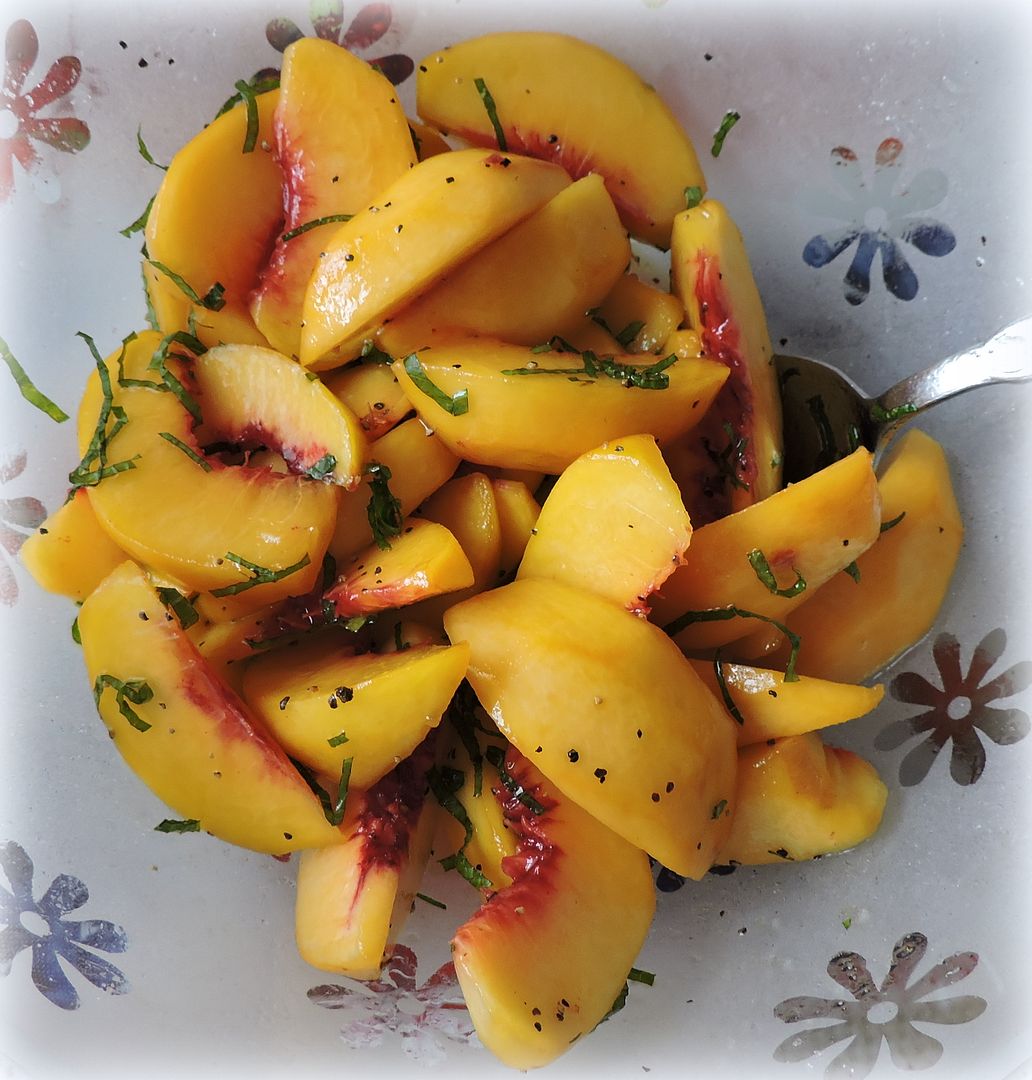
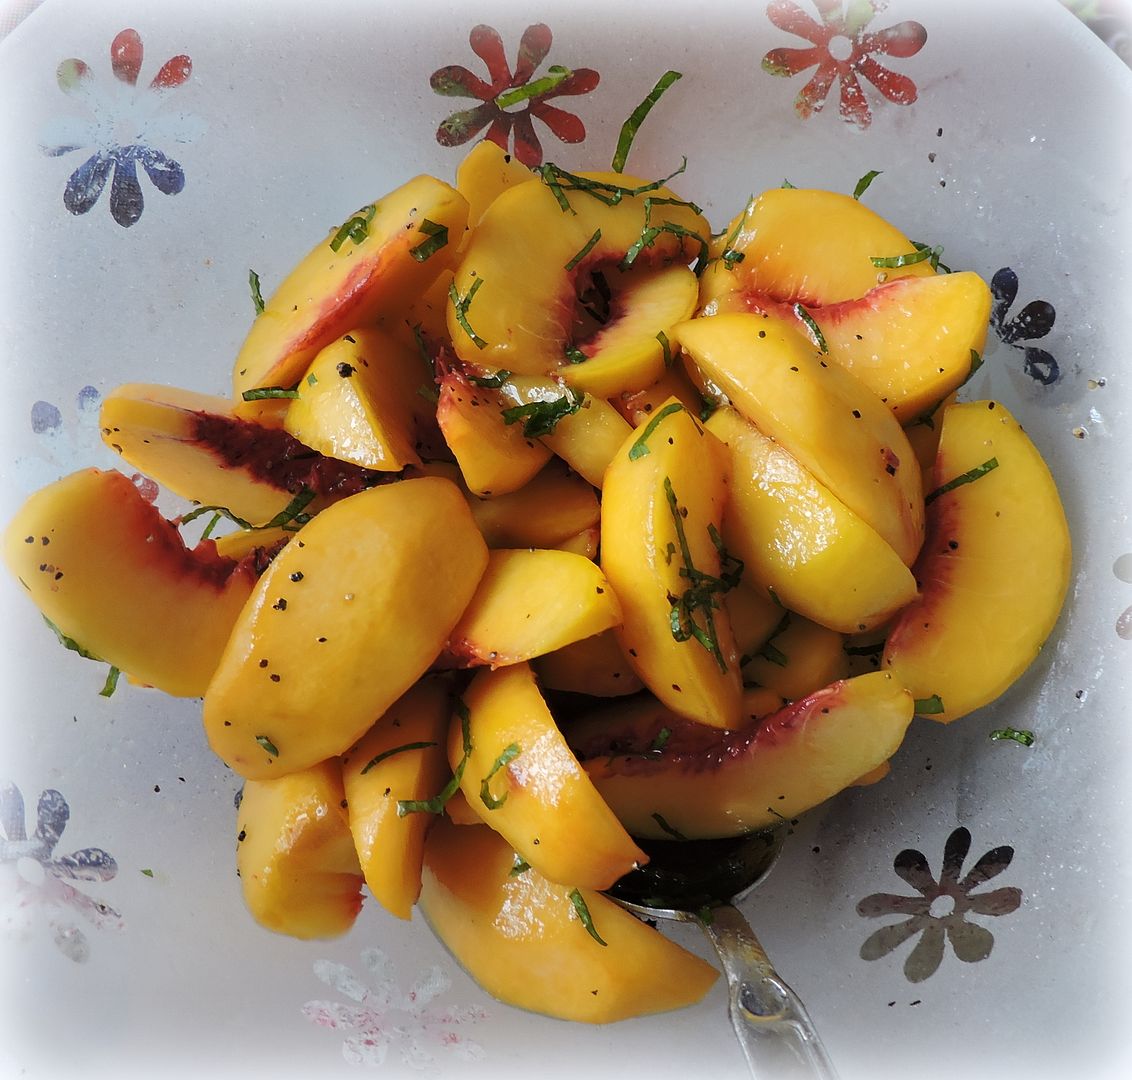
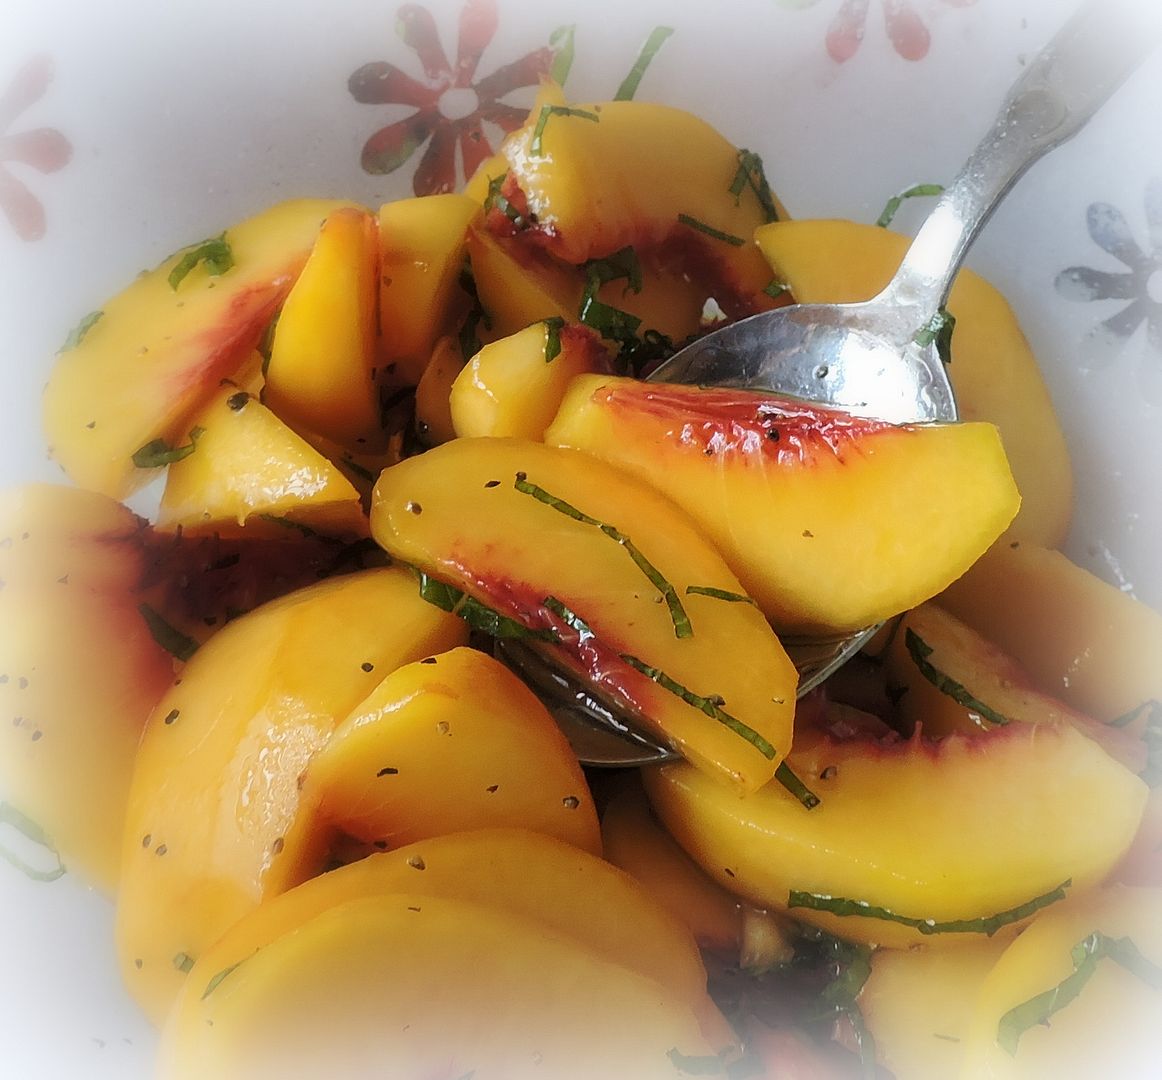
But what to do with those green fruits . . . or peaches. Well, not a problem any longer! This lovely salad takes perfect care of that issue! Oh my, how perfectly delicious it is!
And the best part is it can use the hardest most unforgiving (as the book states) peaches in the pile, in fact the harder the better as they will stand up perfectly to the peeling, pitting and slicing process, staying intact for the whole procedure.
I have added my tips for peeling and cutting. If you don't give this delicious salad a try, you are really going to be missing out on something really special!
This is delicious and makes a great use of the hard peaches you get at the shops. Don't try to make it with fully ripe peaches. They will be too soft and not be able to stand up to the dressin well. This is gorgeous. Talk about making a silk purse from a sow's ear! Adapted from Genius Recipes and accredited to Crook's Corner.
1 kg un-ripened peaches (about 2.2 pounds)
50g of sugar (1/4 cup)
1/2 tsp fine sea salt
2 TBS good quality extra virgin olive oil (I like the Greek, it has a great peppery flavour)
2 TBS fresh mint leaves, cut crosswise chiffonade
1/2 tsp freshly ground black pepper
Blanch the peaches for 2 minutes in a bowl of boiling water. This makes them much easier to peel. The peels should just slip off. Make a slice all the way around the middle of the peach, perpendiculary, and twist, it should pull apart very easily. Remove and discard the pits.
Cut into wedges and drop into a bowl. Add the sugar and salt, giving it all a good swish to combine. Set aside to macerate for 10 to 15 minutes. At the end of that time, add the olive oil, mint and pepper. Toss together to coat and serve. This salad should be eaten on the day.
Just a note on technique, to cut leafy herbs such as mint or basil in what is called "Chiffonade," stack the leaves together, one on top of the other, larger ones on the bottom, roll up tightly like a cigar and then slice thinly crosswise with a very sharp knife. (You should never really chop soft delicate leafy herbs such as basil and mint because it ends up bruising them rather too much.)
We enjoyed this with grilled steaks and baked potatoes. Scrummo!